Step by Step Working with GitHub Repository & Visual Studio 2015
In this blog post, we will learn how to work with GitHub repository and Visual Studio 2015.
The GitHub is one of the most popular code sharing platforms, which follows GIT algorithm for version control. This blog post would help you in answering following two questions:
- How to sync or share a project from Visual Studio to a GitHub Repository
- How to clone a GitHub Repository in Visual Studio?
Syncing or Sharing project from Visual Studio in GitHub Repository
We need to follow steps as mentioned below to share project.
Step 1
Start with creating a Repository on GitHub. To do that navigate to https://github.com/ and click on + sign to create a new repository. I am assuming that you have already created an account on GitHub.
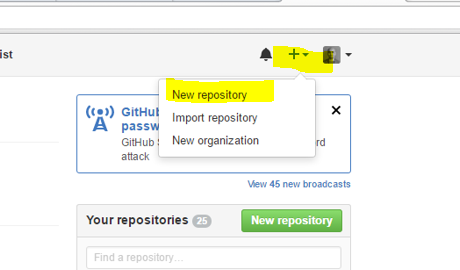
Next, you need to provide information such as:
- Name of the repository
- Description of the repository
- Whether repository is public or private
- Whether to initialize the repository with a README.
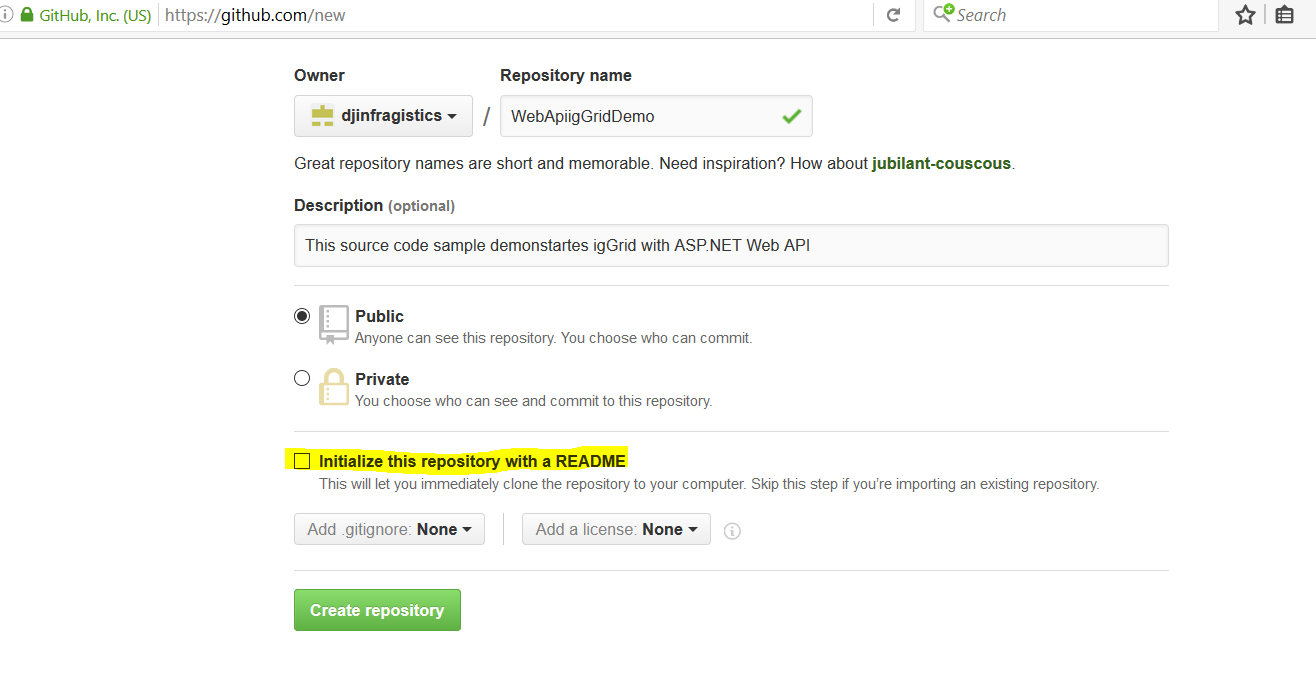
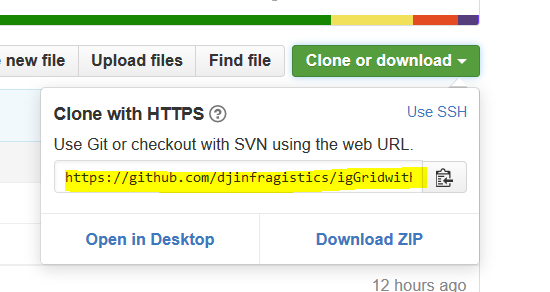
Make sure not to initialize the repository with a README. If you do so, you will get some error while syncing the project to the repository. Once the repository is created, click on Clone or download dropdown and copy the web URL as shown in the image below. We need GitHub repository URL later in Visual Studio.
Step 2
Install Git for Windows on the machine. You can download it from here https://git-scm.com/download/win. After downloading follow the screens to install git on windows.
Step 3
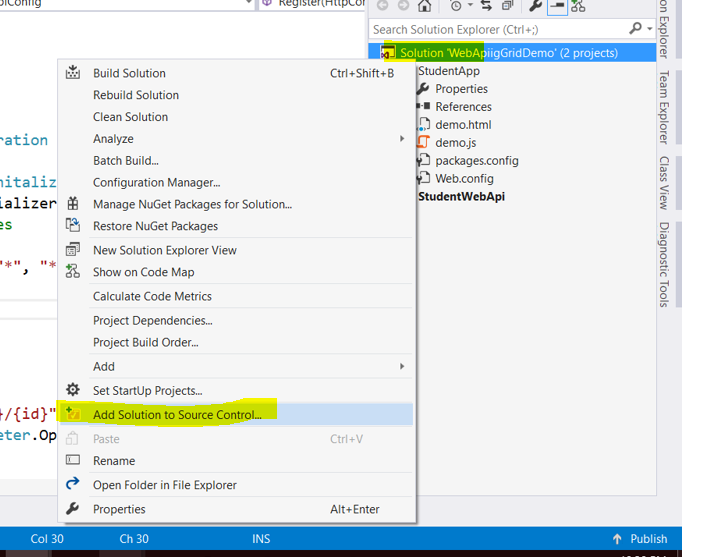
Open the visual studio solution, you want to publish to GitHub repository in Visual Studio. In Visual Studio Solution Explorer, right click on the solution and click on Add Solution to Source Control.
Step 4
Next open Team Explorer by pressing Ctrl+M or opening from View->Team Explorer. In the Team Explorer, click on the Home icon and then select Sync option.
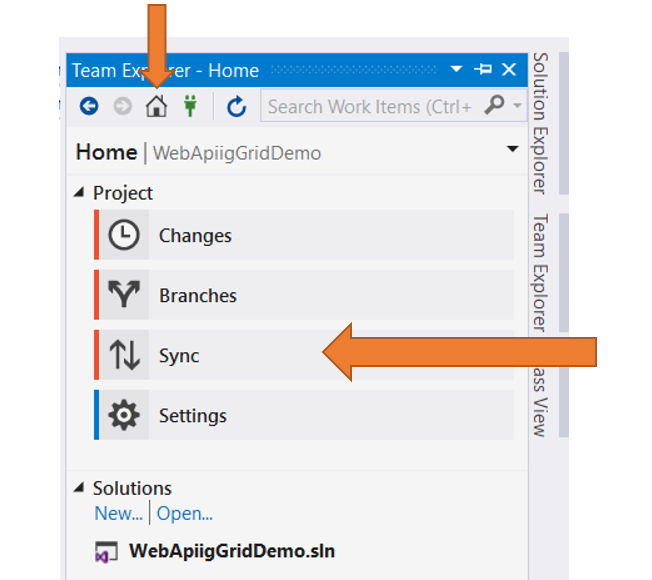
On the next screen, enter GitHub Repository URL (from step 1) and click on publish.
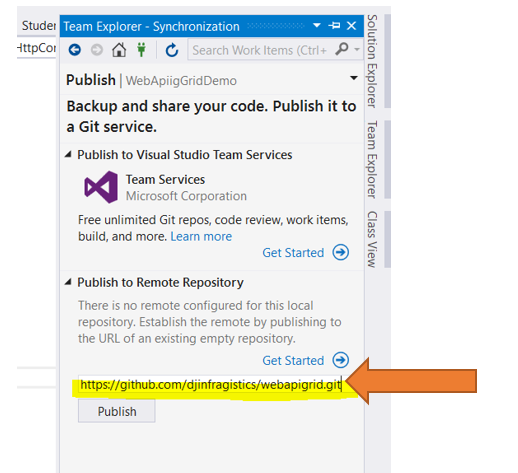
Next, you will be prompted for GitHub credentials, enter that to sync or publish Visual Studio project to GitHub repository.
To verify whether project got successfully published, navigate to GitHub.com and open the repository, you should find the project from Visual Studio listed here.
Sync the changes
After successfully publishing of your project, you can commit the changes to the server also. After changing the code, right click on the solution in the solution explorer and select Commit from the context menu.
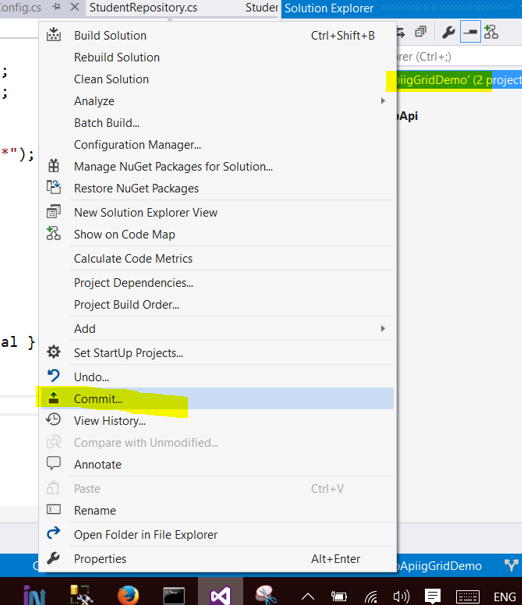
Next, you will be asked to enter the comment for Commit. After entering commit message click on Commit All.
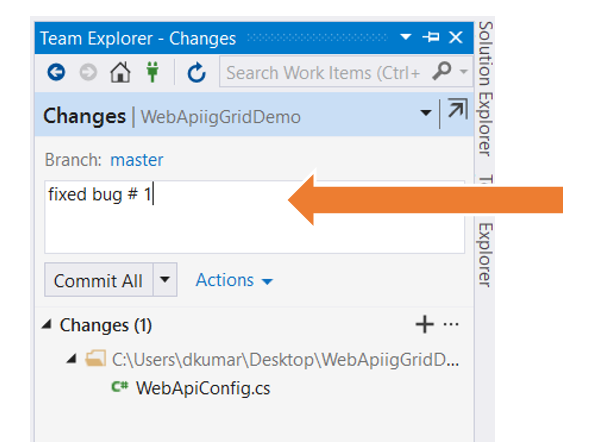
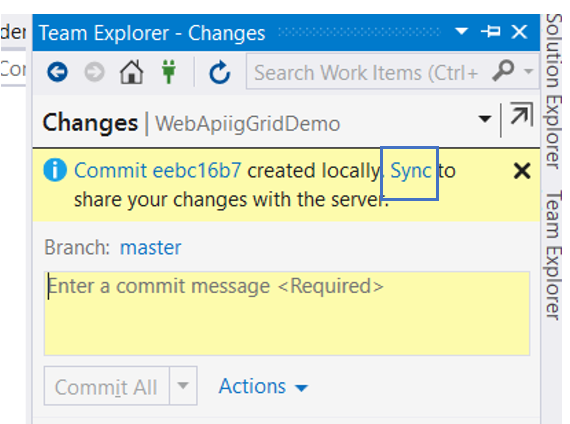
On the next screen click on Sync as shown in the image below
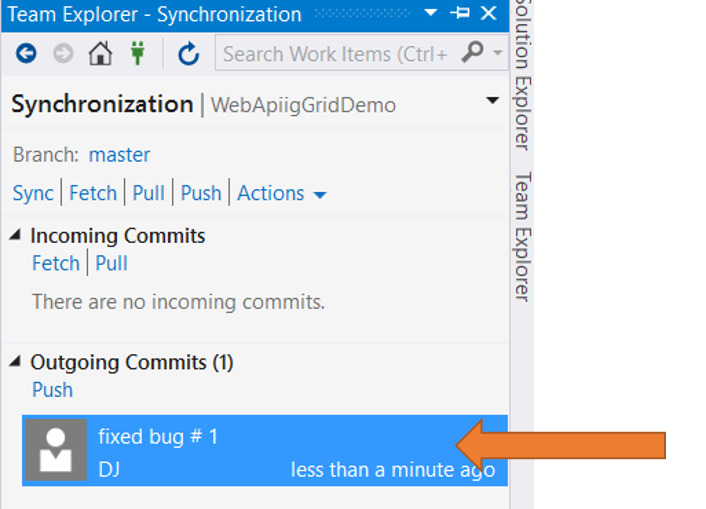
On the next screen click on Push in Outgoing Commits section.
After the successful push, you should get message successfully pushed to origin/master as shown in the image below

In this way, you can sync work on the project in Visual Studio to GitHub Repository.
How to clone a GitHub Repository in Visual Studio?
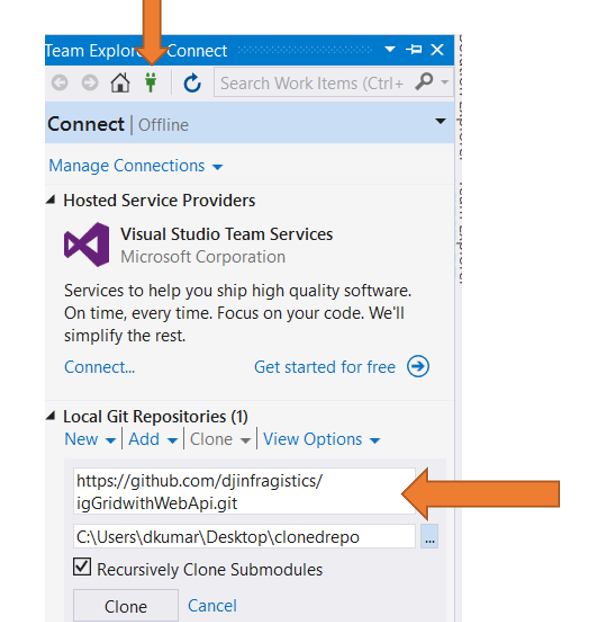
Cloning a repository is very simple. To clone, launch Visual Studio and open Team Explorer. To clone a repository, you need to provide two pieces of information:
- GitHub repository URL
- An empty folder in which repository will be cloned.
Click on connect button in Team Explorer and provide GitHub repository URL and folder name to clone the repository locally.
After successful clone, open the folder you will find projects from the GitHub repository.I hope this post helps you in working with GitHub repository and Visual Studio. Thanks for reading.