WPF XamOutlookBar에 바로 가기 키 지원 추가
Microsoft Outlook 사용자인 경우 간단한 바로 가기 키를 사용하여 다른 Outlook 그룹으로 이동할 수 있다는 것을 알 수 있습니다. 이 블로그 게시물에서는 WPF XamOutlookBar에 키보드 단축키 지원을 쉽게 추가하는 방법을 설명합니다. 더 읽어보기.
최근에 Infragistics WPF xamOutlookBar에서 그룹을 변경하기 위한 바로 가기 키 지원에 관한 질문을 받았습니다. 예를 들어 CRTL+2를 눌러 일정 그룹으로 이동하거나 CRTL+3을 눌러 연락처 그룹으로 이동할 수 있습니다. 여기서 아이디어는 사용자가 키보드를 사용하여 Outlook 표시줄 탐색에 포함된 그룹을 탐색할 수 있다는 것입니다. 불행히도 WPF xamOutlookBar가 이 동작을 지원하지 않는다는 것을 발견했습니다. 그래서 해결책을 찾기 위한 탐구가 시작되었습니다. 나는 실제로 두 가지 해결책을 생각해 냈다. 나는 그들 모두를 설명 할 것이고 당신은 당신이 가장 좋아하는 접근 방식을 결정할 수 있습니다.
요구 사항
코딩 솔루션을 실행하기 전에 이 기능이 어떻게 작동해야 하는지에 대해 이야기해야 할 것입니다.
- 첫 번째 명백한 요구 사항은 키보드 단축키를 사용하여 xamOutlookBar 컨트롤 내에서 선택한 그룹을 변경할 수 있어야 한다는 것입니다.
- 키 수정 자 (CTRL, ALT, SHIFT)와 키보드 키 (A, B, C) 조합이 그룹 변경을 호출 할 수 있도록 할당하고 싶습니다.
- 단일 그룹에 여러 키 제스처 조합을 할당 할 수 있기를 원합니다. 따라서 CTRL + 1 및 SHIFT + 1을 사용하여 동일한 그룹으로 이동하도록하려면 지원해야합니다.
- WPF에서 포커스 및 키보드 이벤트와 관련하여 발생할 수있는 문제를 알고 있습니다. 따라서 어떤 컨트롤에 포커스가 있는지 또는 내 화면의 어디에 있든 상관없이 바로 가기 키 조합으로 Outlook 표시줄 그룹을 변경할 수 있어야 합니다.
그것은 그것을 다루는 것에 관한 것입니다. 문제 해결에 들어가 보겠습니다!
키보드 단축키에 대한 접근 방식 1
필자가 취한 첫 번째 방법은 기본 제공 WPF InputBindings를 활용하는 것이었습니다. 여기서는 Window 레벨에서 여러 KeyBindings를 정의할 것인데, 이는 내 뷰의 어디에 있든 포커스가 있든 상관없이 바로 가기가 실행되도록 하기 때문입니다. 즉, 내 KeyBindings에 바인딩하고 내 키 조합에 따라 그룹 변경을 호출하기 위해 ICommand가 필요합니다. 문제는 이 명령이 키 수정자, 누른 키를 알고 있어야 하며 xamOutlookBar 컨트롤의 모든 그룹에 액세스할 수 있어야 한다는 것입니다. 따라서 KeyBinding 객체 자체를 CommandParameter 로 사용하면 이러한 모든 항목을 명령에 제공 할 수 있습니다. CommandTarget 속성을 통해 xamOutlookBar 컨트롤 자체를 저장하겠습니다. 그러면 내가 필요한 모든 것에 액세스 할 수 있습니다. 또한 기본 제공 InputBindings를 사용하여 바로 가기 조합 / 제스처를 OutlookBarGroup에 할당합니다. 코드를 살펴 보겠습니다.
<Window.InputBindings>

    <KeyBinding Modifiers="Control" Key="D1"
                Command="{Binding ChangeGroupCommand}"
                CommandParameter="{Binding RelativeSource={RelativeSource Self}}"
                CommandTarget="{Binding ElementName=xamOutlookBar1}"/>
    <KeyBinding Modifiers="Control" Key="NumPad1"
                Command="{Binding ChangeGroupCommand}"
                CommandParameter="{Binding RelativeSource={RelativeSource Self}}"
                CommandTarget="{Binding ElementName=xamOutlookBar1}"/>

    <KeyBinding Modifiers="Control" Key="D2"
                Command="{Binding ChangeGroupCommand}"
                CommandParameter="{Binding RelativeSource={RelativeSource Self}}"
                CommandTarget="{Binding ElementName=xamOutlookBar1}"/>
    <KeyBinding Modifiers="Control" Key="NumPad2"
                Command="{Binding ChangeGroupCommand}"
                CommandParameter="{Binding RelativeSource={RelativeSource Self}}"
                CommandTarget="{Binding ElementName=xamOutlookBar1}"/>

    <KeyBinding Modifiers="Control" Key="D3"
                Command="{Binding ChangeGroupCommand}"
                CommandParameter="{Binding RelativeSource={RelativeSource Self}}"
                CommandTarget="{Binding ElementName=xamOutlookBar1}"/>
    <KeyBinding Modifiers="Control" Key="NumPad3"
                Command="{Binding ChangeGroupCommand}"
                CommandParameter="{Binding RelativeSource={RelativeSource Self}}"
                CommandTarget="{Binding ElementName=xamOutlookBar1}"/>

    <KeyBinding Modifiers="Control" Key="D4"
                Command="{Binding ChangeGroupCommand}"
                CommandParameter="{Binding RelativeSource={RelativeSource Self}}"
                CommandTarget="{Binding ElementName=xamOutlookBar1}"/>
    <KeyBinding Modifiers="Control" Key="NumPad4"
                Command="{Binding ChangeGroupCommand}"
                CommandParameter="{Binding RelativeSource={RelativeSource Self}}"
                CommandTarget="{Binding ElementName=xamOutlookBar1}"/>

</Window.InputBindings>
여기에서 볼 수 있듯이 Window.InputBindings 요소에 여러 KeyBindings를 정의했습니다. 숫자를 사용하여 그룹을 변경하고 싶기 때문에 키보드 위쪽에 있는 숫자와 키보드의 숫자 패드에 있는 숫자를 모두 처리해야 합니다. 즉, 각 숫자에 대해 두 개의 KeyBindings가 있습니다. KeyBinding을 ChangeGroupCommand 라는 ViewModel에 정의 된 Command에 데이터 바인딩하고 있습니다. CommandParamter는 KeyBinding 개체 인스턴스가 됩니다. 마지막으로 CommandTarget은 xamOutlookBar 컨트롤이 됩니다. CommandParameter는 KeyBinding 인스턴스이므로 이제 키 제스처(수정자 및 키 누름)와 ViewModel의 xamOutlookBar 컨트롤에 있는 모든 그룹에 액세스할 수 있습니다. VewModel을 간단히 살펴보겠습니다.
public class MainViewModel
{
    public ICommand ChangeGroupCommand { get; set; }

    public MainViewModel()
    {
        ChangeGroupCommand = new RelayCommand<KeyBinding>(x => ChangeGroup(x));
    }

    private void ChangeGroup(KeyBinding keyBinding)
    {
        XamOutlookBar outlookBar = keyBinding.CommandTarget as XamOutlookBar;
        if (outlookBar != null)
        {
            foreach (var group in outlookBar.Groups)
            {
                foreach (KeyBinding binding in group.InputBindings)
                {
                    if (binding.Modifiers == keyBinding.Modifiers && binding.Key == keyBinding.Key)
                    {
                        group.IsSelected = true;
                        return;
                    }
                }
            }
        }
    }
}
이것은 단일 ICommand 속성이 정의 된 매우 간단한 ViewModel입니다. ICommand는 RelayCommand 구현입니다. RelayCommand에 익숙하지 않은 경우 Google/Bing이 친구입니다. ChangeGroup 메서드는 KeyBinding 매개 변수를 받아 CommandTarget 속성에서 xamOutlookBar 컨트롤을 가져온 다음 xamOutlookBar의 각 그룹에서 들어오는 KeyBinding과 일치하는 InputBindings가 있는 그룹을 검색하기 시작합니다. OutlookBarGroups에 KeyBindings를 어떻게 할당합니까? 다음과 같이 쉽습니다.
<igWPF:XamOutlookBar x:Name="xamOutlookBar1" HorizontalAlignment="Left">
    <igWPF:OutlookBarGroup Header="Group 1">
        <igWPF:OutlookBarGroup.InputBindings>
            <KeyBinding Modifiers="Control" Key="D1" />
            <KeyBinding Modifiers="Control" Key="NumPad1" />
        </igWPF:OutlookBarGroup.InputBindings>

        <Label Content="Content for Group 1"/>
    </igWPF:OutlookBarGroup>
    <igWPF:OutlookBarGroup Header="Group 2">
        <igWPF:OutlookBarGroup.InputBindings>
            <KeyBinding Modifiers="Control" Key="D2" />
            <KeyBinding Modifiers="Control" Key="NumPad2" />
        </igWPF:OutlookBarGroup.InputBindings>

        <Label Content="Content for Group 2"/>
    </igWPF:OutlookBarGroup>
    <igWPF:OutlookBarGroup Header="Group 3">
        <igWPF:OutlookBarGroup.InputBindings>
            <KeyBinding Modifiers="Control" Key="D3" />
            <KeyBinding Modifiers="Control" Key="NumPad3" />
        </igWPF:OutlookBarGroup.InputBindings>

        <Label Content="Content for Group 3"/>
    </igWPF:OutlookBarGroup>
    <igWPF:OutlookBarGroup Header="Group 4">
        <igWPF:OutlookBarGroup.InputBindings>
            <KeyBinding Modifiers="Control" Key="D4" />
            <KeyBinding Modifiers="Control" Key="NumPad4" />
        </igWPF:OutlookBarGroup.InputBindings>

        <Label Content="Content for Group 4"/>
    </igWPF:OutlookBarGroup>
</igWPF:XamOutlookBar>
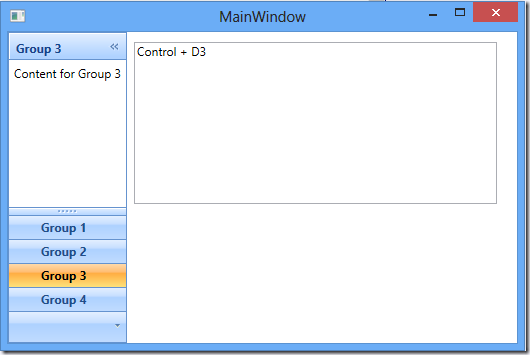
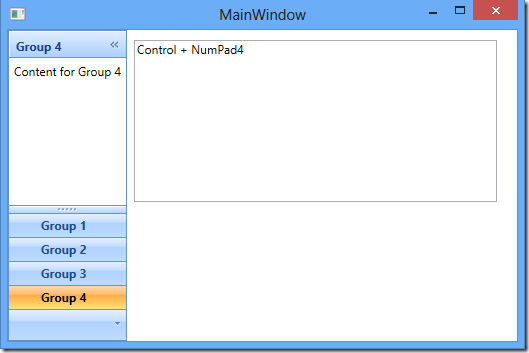
OutlookBarGroup.InputBindings 컬렉션에 여러 개의 KeyBindings를 추가하기만 하면 됩니다. 숫자를 입력하는 방법이 다르기 때문에 각 키 조합에 대해 KeyBinding을 추가해야 합니다. 그게 전부입니다. 이제 앱을 실행하면 키보드 단축키가 예상대로 작동합니다. CTRL+3을 누르면 OutlookBarGroup이 "그룹 3"으로 선택됩니다.

접근법 2
첫 번째 접근 방식은 잘 작동했지만 약간의 중복된 노력이 있었습니다. KeyBindings를 두 번 이상 매핑하고 싶지 않았습니다. 나는 켜고 끌 수 있고 모든 것이 작동하도록하는 간단한 속성을 선호한다. 그래서 저는 코드를 조금 더 사용하지만 훨씬 더 유연하고 구현하기 쉬운 다른 접근 방식을 취하기로 결정했습니다. 이 두 번째 방법은 AttachedProperty와 기본 제공 KeyBindings를 활용합니다. OutlookBarGroups의 KeyBindings는 조금도 변경되지 않았습니다. 그것들은 그들이 있는 곳에 머물러 있습니다. 그룹 변경을 호출할 바로 가기 키 제스처를 정의하는 데 여전히 사용됩니다. 다음으로 EnableInputBindings라는 AttachedProperty를 만들겠습니다. 코드를 제공 한 다음 다양한 섹션에 대해 이야기 할 것입니다.
public class InputBinding : DependencyObject
{
    public static readonly DependencyProperty InputBindingBehaviorProperty =
        DependencyProperty.RegisterAttached("InputBindingBehavior", typeof(XamOutlookBarKeyBindingBehavior), typeof(InputBinding), new PropertyMetadata(null));

    public static readonly DependencyProperty EnableKeyBindingsProperty =
        DependencyProperty.RegisterAttached("EnableKeyBindings", typeof(bool), typeof(InputBinding), new PropertyMetadata(false, new PropertyChangedCallback(EnableKeyBindingsChanged)));
    public static bool GetEnableKeyBindings(DependencyObject obj)
    {
        return (bool)obj.GetValue(EnableKeyBindingsProperty);
    }
    public static void SetEnableKeyBindings(DependencyObject obj, bool value)
    {
        obj.SetValue(EnableKeyBindingsProperty, value);
    }

    private static void EnableKeyBindingsChanged(DependencyObject d, DependencyPropertyChangedEventArgs e)
    {
        XamOutlookBar outlookBar = d as XamOutlookBar;
        bool isEnabled = (bool)e.NewValue;

        if (outlookBar != null)
        {
            XamOutlookBarKeyBindingBehavior behavior = GetOrCreateBehavior(outlookBar);

            if (isEnabled)
                behavior.Attach();
            else
                behavior.Dettach();
        }
    }

    private static XamOutlookBarKeyBindingBehavior GetOrCreateBehavior(XamOutlookBar outlookBar)
    {
        XamOutlookBarKeyBindingBehavior behavior = outlookBar.GetValue(InputBindingBehaviorProperty) as XamOutlookBarKeyBindingBehavior;
        if (behavior == null)
        {
            behavior = new XamOutlookBarKeyBindingBehavior(outlookBar);
            outlookBar.SetValue(InputBindingBehaviorProperty, behavior);
        }

        return behavior;
    }
}

public class XamOutlookBarKeyBindingBehavior : InputBindingBehaviorBase<XamOutlookBar>
{
    Window _parentWindow;

    public XamOutlookBarKeyBindingBehavior(XamOutlookBar outlookBar)
        : base(outlookBar)
    {

    }

    public override void Attach()
    {
        //since we want to listen for all key events no matter which control has focus, we need to listen at the Window level
        //otherwise the KeyUp event will never execute
        if (_parentWindow == null)
            _parentWindow = Window.GetWindow(TargetObject);

        if (_parentWindow != null)
            _parentWindow.AddHandler(Keyboard.KeyUpEvent, (KeyEventHandler)HandleKeyUp, true);
    }

    public override void Dettach()
    {
        if (_parentWindow != null)
            _parentWindow.RemoveHandler(Keyboard.KeyUpEvent, (KeyEventHandler)HandleKeyUp);
    }

    void HandleKeyUp(object sender, System.Windows.Input.KeyEventArgs e)
    {
        try
        {
            //We only want to check for shorcuts if we are dealing with modifier keys.
            if (Keyboard.Modifiers == ModifierKeys.None)
                return;

            foreach (OutlookBarGroup group in TargetObject.Groups)
            {
                foreach (KeyBinding binding in group.InputBindings)
                {
                    if (binding.Modifiers == Keyboard.Modifiers && binding.Key == e.Key)
                    {
                        group.IsSelected = true;
                        return;
                    }
                }
            }
        }
        catch (Exception ex)
        {
            Debug.WriteLine(ex.Message);
        }
    }
}

public abstract class InputBindingBehaviorBase<T> where T : UIElement
{
    private readonly WeakReference _targetObject;
    protected T TargetObject
    {
        get { return _targetObject.Target as T; }
    }

    public InputBindingBehaviorBase(T targetObject)
    {
        _targetObject = new WeakReference(targetObject);
    }

    public abstract void Attach();
    public abstract void Dettach();

}
여기서 우리가 가지고 있는 것은 약간의 InputBinding 프레임워크를 만드는 것입니다. 먼저 입력 바인딩을 켜거나 끌 수있는 AttachedProperty 가 있습니다. 또한 InputBindingBehavior라는 기능을 제공할 동작 클래스의 인스턴스를 단순히 보유하는 연결된 속성을 정의했습니다.
EnableKeyBindings 연결 속성이 설정되면 새 XamOutlookBarKeyBindingBehavior 클래스 인스턴스가 생성되어 InputBindingBehavior 연결 속성에 저장됩니다. EnableKeyBindings가 true이면 동작이 연결되고, false이면 분리됩니다. XamOutlookBarKeyBindingBehvaior 클래스를 보면 실제로 qute simple임을 알 수 있습니다. 이 클래스는 InputBindingBehaviorBase<T>라는 추상 기본 클래스에서 파생되며, 이 클래스는 단순히 대상 개체(이 경우 xamOutlookBar)에 대한 약한 참조를 보유합니다. 동작이 연결되면 먼저 맨 위에 있는 부모 Window 컨트롤에 대한 인스턴스를 가져옵니다. 우리는 이벤트에서 초점이 맞춰진 내용에 관계없이 바로 가기 제스처를 실행하고 싶다는 것을 기억하십시오. Window 인스턴스가 있으면 이제 KeyUp 이벤트에 핸들러를 추가하여 "처리된" 이벤트도 처리하도록 지정할 수 있습니다. KeyUp 핸들러는 먼저 수정자를 처리하고 있는지 확인합니다. 아무 것도 없으면 logic를 실행하고 싶지 않습니다. 그렇다면 모든 그룹을 반복하고 방금 누른 바로 가기 키 제스처와 일치하는 KeyBindings가 있는지 확인합니다. 일치하는 항목이 있으면 그룹을 선택합니다. 마지막 단계는 xamOutlookBar 컨트롤에서 연결된 속성을 설정하는 것입니다.
<igWPF:XamOutlookBar x:Name="xamOutlookBar1" HorizontalAlignment="Left"
                     local:InputBinding.EnableInputBindings="True">

    <igWPF:OutlookBarGroup Header="Group 1">
        <igWPF:OutlookBarGroup.InputBindings>
            <KeyBinding Modifiers="Control" Key="D1" />
            <KeyBinding Modifiers="Control" Key="NumPad1" />
        </igWPF:OutlookBarGroup.InputBindings>
        <Label Content="Content for Group 1"/>
    </igWPF:OutlookBarGroup>
    <igWPF:OutlookBarGroup Header="Group 2">
        <igWPF:OutlookBarGroup.InputBindings>
            <KeyBinding Modifiers="Control" Key="D2" />
            <KeyBinding Modifiers="Control" Key="NumPad2" />
                        </igWPF:OutlookBarGroup.InputBindings>
        <Label Content="Content for Group 2"/>
    </igWPF:OutlookBarGroup>
    <igWPF:OutlookBarGroup Header="Group 3">
        <igWPF:OutlookBarGroup.InputBindings>
            <KeyBinding Modifiers="Control" Key="D3" />
            <KeyBinding Modifiers="Control" Key="NumPad3" />
                        </igWPF:OutlookBarGroup.InputBindings>
        <Label Content="Content for Group 3"/>
    </igWPF:OutlookBarGroup>
    <igWPF:OutlookBarGroup Header="Group 4">
        <igWPF:OutlookBarGroup.InputBindings>
            <KeyBinding Modifiers="Control" Key="D4" />
            <KeyBinding Modifiers="Control" Key="NumPad4" />
                        </igWPF:OutlookBarGroup.InputBindings>
        <Label Content="Content for Group 4"/>
    </igWPF:OutlookBarGroup>
</igWPF:XamOutlookBar>
보시다시피 이 방법은 설정하는 데 조금 더 많은 코드가 필요하지만 이제 바로 가기 제스처 지원을 훨씬 쉽게 활성화할 수 있습니다. 단일 연결된 속성을 True로 설정하고 그룹에서 KeyBindings를 정의하면 실행됩니다. 같은 결과, 단지 다른 방법이있을 뿐입니다.

소스 코드를 다운로드하고 재미있게 보내세요.
궁금해서 어떤 접근 방식을 선호하십니까?