SqlDataSource1.InsertCommand = "insert into Categories (CategoryName) Values ('" & DirectCast(e.Value, DropDownItem).Text & "')"SqlDataSource1.Insert()WebDropDown™ allows custom end-user entered values to be persisted. For instance, your end-user may want to enter values that are not in the initial drop-down list and even more importantly, they may want the values to persist so that they can select the item later without entering it again; you may even want other end-users to select the end-user entered custom values. WebDropDown exposes an elegant event handling mechanism that you can easily use to allow the persisting of end-user entered custom values to your back end so that they can be persisted and selected again by anyone using your application.
Place a WebDropDown control on the form and leave it with its default name.
Bind the drop-down to the Categories table of the Northwind database. For more information on how to bind WebDropDown to SQLDataSource, see Binding WebDropDown to a Sql Data Source. Now you will have a SqlDataSource component on the form with SqlDataSource1 as its name.
In the Microsoft® Visual Studio® Property Window set the TextField property of WebDropDown to CategoryName and the ValueField property to CategoryID.
Set the WebDropDown control’s EnablePersistingCustomValues and EnableCustomValueSelection properties to True.
Add an event handler for the WebDropDown control’s ItemAdded event. This event, in conjunction with the EnablePersistingCustomValues property, will fire whenever your end-user types in a value into the WebDropDown editor and the value does not exist in the list.
In the WebDropDown control’s ItemAdded event handler, add the following code to insert the custom, end-user entered values into your back-end:
In Visual Basic:
SqlDataSource1.InsertCommand = "insert into Categories (CategoryName) Values ('" & DirectCast(e.Value, DropDownItem).Text & "')"SqlDataSource1.Insert()In C#:
SqlDataSource1.InsertCommand = "insert into Categories (CategoryName) Values ('" +((DropDownItem)e.Value).Text + "')";SqlDataSource1.Insert();In the above code we first cast the value of the item that is raising the ItemAdded event into an object of DropDownItem class and then get the Text of the item and insert it into the database.
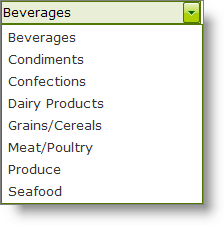
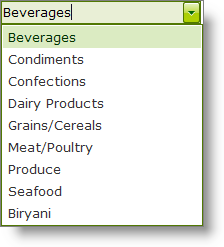
Save and run the application. You will observe that the custom values you enter will persist similar to the following images:
Before entering a custom value :

After entering a custom value of "Biryani":
