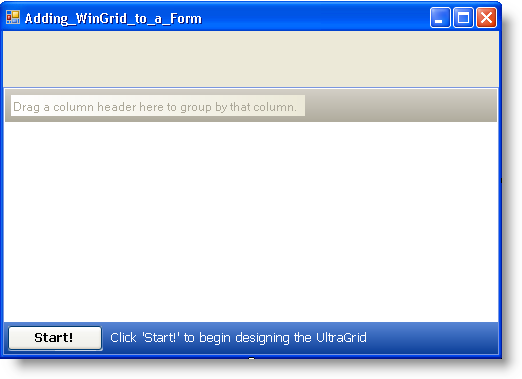
This Quick Start tutorial helps get WinGrid™ running in a Windows Application Project. Before starting this tutorial the developer should be familiar with Visual Studio and ADO.NET.
Select Design view for form.
Click UltraGrid in the Toolbox then click on the Form Designer.

We need to provide a data container and some data to the WinGrid. The following steps show you how to create a three column DataTable containing a number, a string and a date and bind it to UltraGrid.
Add the FormLoad event to the project and add the following code to this method:
In Visual Basic:
Private Sub Adding_WinGrid_to_a_Form_Load(ByVal sender As System.Object, _
  ByVal e As System.EventArgs) Handles MyBase.Load
	Dim Keys(1) As DataColumn
	' Create a data table
	Dim dt As New DataTable("TableTest")
	' Create a number column
	Dim dcNumber As New DataColumn("NumberColumn", GetType(Int32))
	dt.Columns.Add(dcNumber)
	' Add this column to the keys array, apply as primary key
	Keys(0) = dcNumber
	dt.PrimaryKey = Keys
	' Create a string column
	Dim dcString As New DataColumn("StringColumn", GetType(String))
	dcString.MaxLength = 50
	dt.Columns.Add(dcString)
	' Create a date column
	Dim dcDate As New DataColumn("DateColumn", GetType(Date))
	dt.Columns.Add(dcDate)
	' Add a row
	Dim row As DataRow = dt.NewRow()
	row("NumberColumn") = 1
	row("StringColumn") = "Test on row 1"
	row("DateColumn") = Now
	dt.Rows.Add(row)
	' Add a second row
	row = dt.NewRow()
	row("NumberColumn") = 2
	row("StringColumn") = "Test on row 2"
	row("DateColumn") = Now.AddDays(1)
	dt.Rows.Add(row)
	' Bind the table to the grid
	Me.UltraGrid1.DataSource = dt
End Sub
In C#:
private void Adding_WinGrid_to_a_Form_Load(object sender, EventArgs e)
{
	DataColumn[] Keys = new DataColumn[2];
	// Create a data table
	DataTable dt = new DataTable("TableTest");
	// Create a number column
	DataColumn dcNumber = new DataColumn("NumberColumn",
	  System.Type.GetType("System.Int32"));
	dt.Columns.Add(dcNumber);
	// Add this column to the keys array, apply  primary key
	Keys[0] = dcNumber;
	dt.PrimaryKey = Keys;
	// Create a string column
	DataColumn dcString = new DataColumn("StringColumn",
	  System.Type.GetType("System.String"));
	dcString.MaxLength = 50;
	dt.Columns.Add(dcString);
	// Create a date column
	DataColumn dcDate = new DataColumn("DateColumn",
	  System.Type.GetType("System.DateTime"));
	dt.Columns.Add(dcDate);
	// Add a row
	DataRow row = dt.NewRow();
	row["NumberColumn"] = 1;
	row["StringColumn"] = "Test on row 1";
	row["DateColumn"] = System.DateTime.Now;
	dt.Rows.Add(row);
	// Add a second row
	row = dt.NewRow();
	row["NumberColumn"] = 2;
	row["StringColumn"] = "Test on row 2";
	row["DateColumn"] = System.DateTime.Now.AddDays(1);
	dt.Rows.Add(row);
	// Bind the table to the grid
	this.ultraGrid1.DataSource = dt;
}
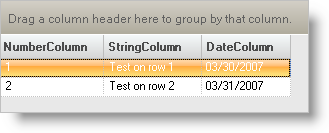
Build and run the project. You should see something similar to the following.

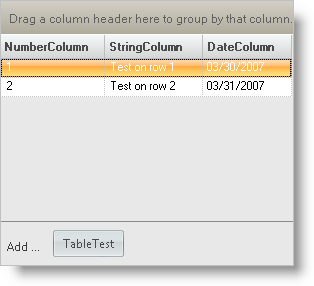
A popular thing to use the WinGrid for is data entry. You can quickly enable the ability for your users to add new records to your WinGrid by setting the AddNewBox.Hidden property to False.
Add the UltraGrid1 InitializeLayout event to the project and insert the following code:
In Visual Basic:
Private Sub UltraGrid1_InitializeLayout(ByVal sender As Object, _
  ByVal e As Infragistics.Win.UltraWinGrid.InitializeLayoutEventArgs) _
  Handles UltraGrid1.InitializeLayout
	' Turn on AddNew button
	e.Layout.AddNewBox.Hidden = False
End Sub
In C#:
private void ultraGrid1_InitializeLayout(object sender,
  Infragistics.Win.UltraWinGrid.InitializeLayoutEventArgs e)
{
	// Turn on AddNew button
	e.Layout.AddNewBox.Hidden = false;
}
Build and run the project again. Your WinGrid should now look similar to the following screen shot. The area at the bottom of the WinGrid allows records to be added to your WinGrid by your users.
