
Before You Begin
The Row Layout with Group mode enables you to create groups that contain columns as well as other groups thus offering multi – level grouping within WinGrid™.
What you will accomplish
This walkthrough will show you how to add Groups using the WinGrid Designer. This topic starts off with a WinGrid control placed on a Windows Form and the WinGrid control is bound to a data source with the following schema. For more information on how to bind WinGrid to data, please review the Binding WinGrid to a Flat Data Source topic.

Follow these Steps
Click the Start Button on WinGrid. This will launch the UltraWinGrid Designer.
Locate the Band and Column Settings node in the menu tree on the left hand side and expand it.
Locate and Expand the ‘Budget and Expense Summary’ Band and click on Column Arrangement Overview. For more information on how to use the Row Layouts Designer, please see the Using Row Layouts Designer topic.
From the right hand side of the Designer, you select Use Row Layout with Groups.
Click the ‘Design Column Arrangement Now’ button. This will cause the Row Layout Designer to launch.
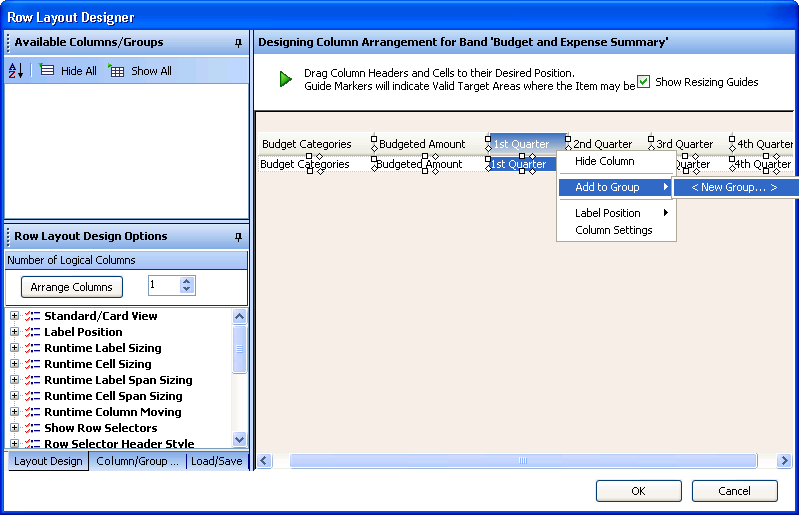
Create a Group - Right click on the 1stQuarter column Header and from the context menu select Add to Group > New Group.
A new group named NewGroup0 is created. Select this Group and the Group’s settings can be modified in the ColumnInfo Property Settings Pane available to the left of the Row Layout Designer. Set the Caption property to ‘2008 (Jan-June)’ to provide a meaningful name to the new group.
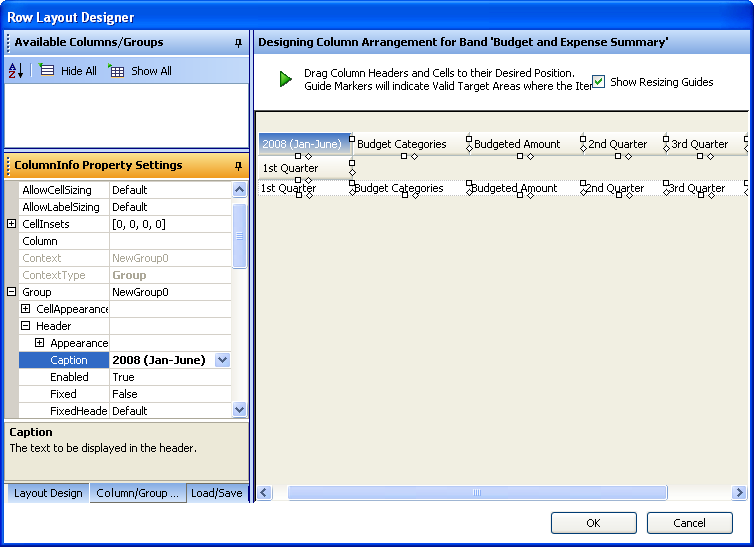
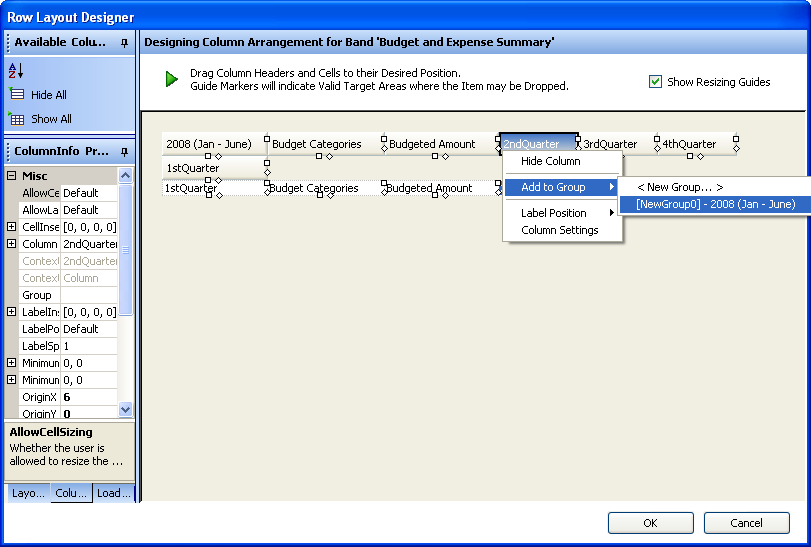
The 1st Quarter column now falls under the 2008 (Jan-June) group. Now, using the same technique, right click the 2nd Quarter column and add it to the 2008 (Jan-June) group as well.
Using the same technique outlined in step 6 and 7, create a new group named 2008 (July-Dec) and add the remaining 3rd Quarter and 4th Quarter columns to this group.
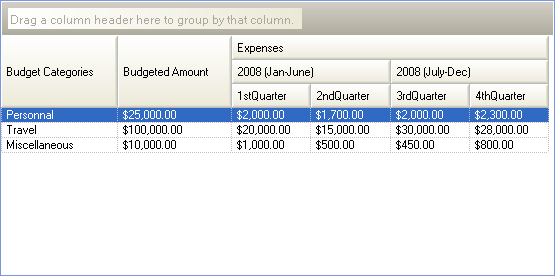
Create a Parent Group – Many levels of groups can be created. In this step, we will add our previously created groups to a top level group named Expenses. Right click the 2008 (Jan-June) group and using the same technique, add it to a new group named Expenses. Do the same and add the 2008 (July-Dec) group to the Expenses group. At this point, your Group Layout arrangement should look like the screenshot below.
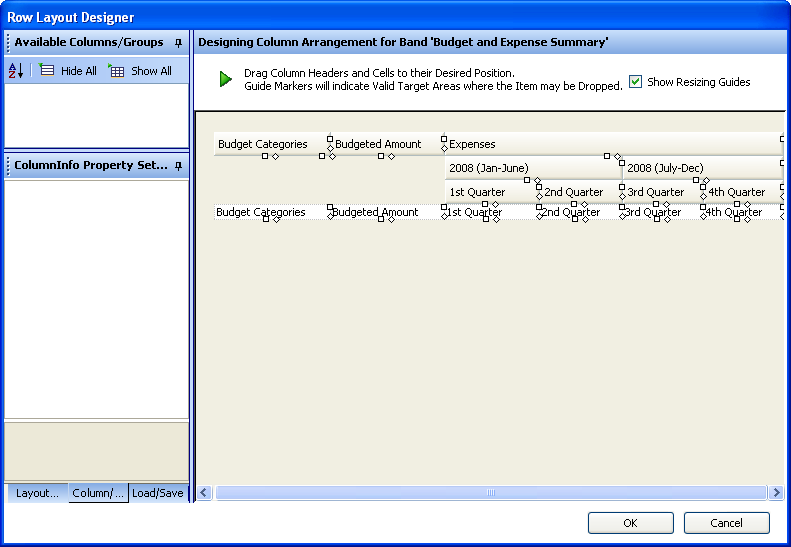
At this point, you have successfully learned how to group columns in row layout mode. However you may notice that the Budget Categories and Budget Amount columns have a large space between the Column Header and the data cell. In order to make this cosmetically appealing, simply click on the diamond icon located on the bottom of the Budget Categories column header and drag it downward. This will change the SpanY property so that the column header will now occupy that empty space below it. Repeat the same procedure for the Budget Amount column header.
Run the Application. Your WinGrid should look similar to the following image.
Related Topics