This topic is designed to show you how to add controls to the TaskPaneTool. This topic is a continuation of Adding the TaskPane Tool to the TaskPane Toolbar (Part 2 of 3).
To add controls to the TaskPaneTool the controls have to be on the form. So first, we will add a control to our form. We will be adding the UltraExplorerBar control to the TaskPaneTool.
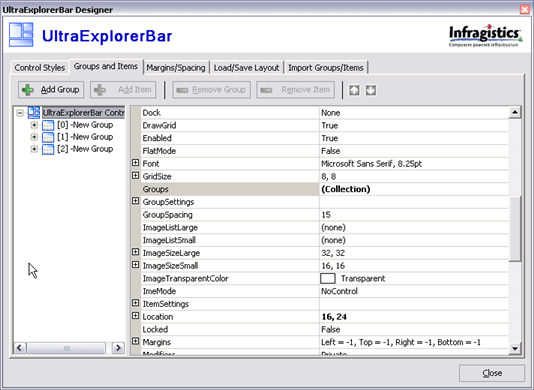
After placing an UltraExplorerBar control onto the form, add some groups and items to it. You can use the designer of the UltraExplorerBar to do this. To add them in the designer just right click on the UltraExplorerBar and select UltraExplorerBar Designer. In this dialog make sure you are on the Groups and Items tab and click Add Group then Add Item, repeat the process as many times as you want.

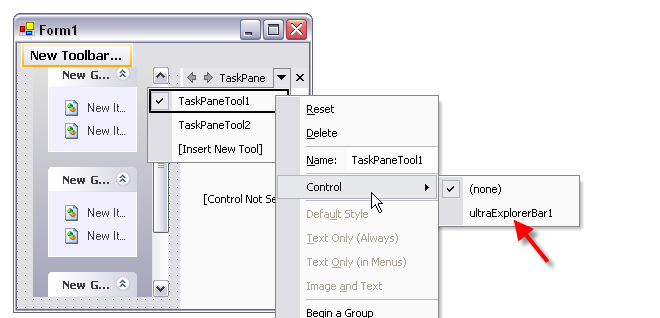
With that done now go over to the header on the TaskPaneToolbar and select the drop down arrow to see the list of TaskPaneTools we have available. Mouse down and right click on TaskPaneTool1, and then mouse down to Control. With Control highlighted, you see a side menu come out showing a list of controls you can add to the TaskPaneTool. Select our newly created UltraExplorerBar.

Once you have done this you will notice that the UltraExplorerBar did not move off the form over to the TaskPaneTool. Instead the TaskPaneTool now says "[Control ('UltraExplorerBar1 [UltraExplorerBar1]') will be displayed at runtime]". This means the control will not be re-parented (i.e. displayed within the content area) at design time, but will be shown there when the form runs. You can however move the control over the top of the UltraTaskPaneToolbar to get it out of the way, so you can place other controls on the form.
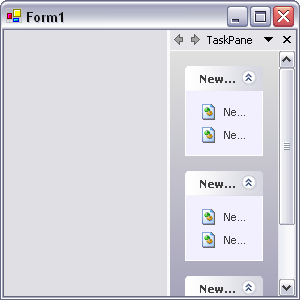
If you now build and run the project, you can see the UltraExplorerBar control shown in the TaskPaneTool.

That is all there is to adding a control to a TaskPaneTool.