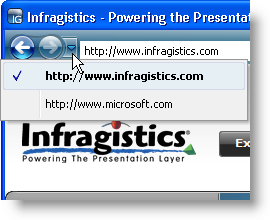
The easiest way to create a navigation history is to simply navigate to a new item. The Navigation toolbar will automatically add each navigated item to the navigation history, so all you need to do is call the NavigateTo method. When you call the NavigateTo method, Navigation toolbar adds the item to the BackHistory collection, thus creating a navigation history.
The NavigateTo method exposes two overloads. The first overload accepts a string and an object while the second overload accepts a NavigationHistoryItem object. We’re concerned with the first overload, a string and an object. The string is the text that displays in the recent history menu, accessed by the drop-down button to the right of the forward button. The object is an optional object that you can associate with the item. This object can be another string, an image, a collection of NavigationHistoryItem objects, or anything else. If you prefer not to attach an object, pass in null (Nothing).
The following code will navigate to a new item, therefore adding it to the BackHistory collection.

In Visual Basic:
Me.UltraToolbarsManager1.NavigationToolbar.NavigateTo _
	("http://ko.infragistics.com", Nothing);
In C#:
this.ultraToolbarsManager1.NavigationToolbar.NavigateTo
	("http://ko.infragistics.com", null);