This example will show you how to apply Metro Theme to the xamRadialGauge control. However, you can follow the same steps to apply themes to other controls in the Ultimate UI for WPF product. In the same way, you can apply the IG or Office 2010 Blue Theme to the xamRadialGauge or other controls.
|
Note
|
Note
The following example assumes that you have already added assembly references for the xamRadialGauge control in your project. Also, you will have to remove implicit or explicit styles and appearance properties that you might have previously set on the xamRadialGauge control in your application; otherwise the Metro Theme will not be applied correctly.
|
-
Add a new folder to your project and name it "Themes".
-
Drag-and-drop the IG Theme folder from the following location to your Themes folder. This will add all theme resource files for the Metro Theme to your project; but you can remove the resource dictionaries that you will not be using in your application.
|
Note
|
Note
There are three shared files that you should always keep next to your theme resource files - Theme.Colors.xaml, Styles.Shared.xaml and Styles.WPF.xaml. Some or all of these files are referenced in the control’s theme.
|
C:\Program Files (x86)\Infragistics\2020.1\WPF\Themes
|
Note
|
Note
The theme resource file can be embedded in the project as Content or Resource. This is specified in the FileProperties window in the Visual Studio – Build Action property.
|
-
If the theme resource file is embedded as Content, it will be included in the application package, and you have to set the relative path to the Theme folder.
-
If the theme resource file is embedded as Resource into the application assembly, the Source property will need to be prepended with assembly name of your application.
The following table shows examples of a source path based on different build actions selected for embedding the theme resource file.
| Build Action |
Source Path for Theme Resource File |
|
/Themes/MetroTheme/Metro.xamGauges.xaml
|
|
/AppAssemblyName;component/Themes/MetroTheme/Metro.xamGauges.xaml
|
|
Note
|
Note
You can merge the theme resource file for a control at the Application level to apply the theme to all instances of the control in your project or you can merge it at the Page, Window, or Control level to apply the theme to a single instance of the control in your project.
|
-
Apply the Metro theme for the xamRadialGauge control in your application:
<Application.Resources>
    <ResourceDictionary>
        <ResourceDictionary.MergedDictionaries>
            <ResourceDictionary Source="/Themes/MetroTheme/Metro.xamGauges.xaml"/>
        </ResourceDictionary.MergedDictionaries>
    </ResourceDictionary>
</Application.Resources>
Dim resource As New ResourceDictionary()
resource.Source = New Uri("/Themes/MetroTheme/Metro.xamGauges.xaml", UriKind.Relative)
Application.Current.Resources.MergedDictionaries.Add(resource)
ResourceDictionary resource = new ResourceDictionary();
resource.Source = new Uri("/Themes/MetroTheme/Metro.xamGauges.xaml", UriKind.Relative);
Application.Current.Resources.MergedDictionaries.Add(resource);
-
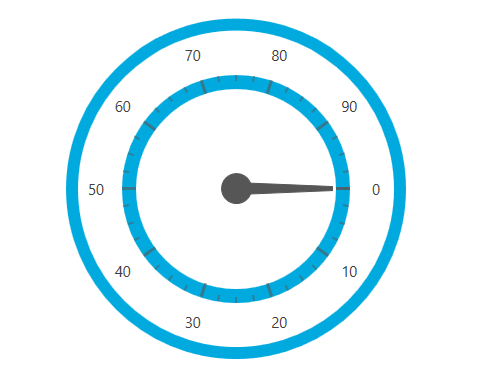
Save and run your project. The following image shows the xamRadialGauge control with applied Metro Theme.