
This topic describes the available user interactions using the xamGantt™ control’s grid section.
The following topics are prerequisites to understanding this topic:
This topic contains the following sections:
The following table summarizes the xamGantt control’s grid section and its user interaction capabilities. Additional details follow later in this topic.
The user can sort a column in the grid section of the xamGantt control.
To achieve this interaction, click on the desired column in the Grid section and use the left mouse button on the column header. The sorting indicator shows the performed sorting type (ascending or descending).
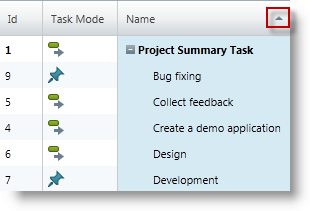
Use a xamGantt command to reset the sorted column back to its initial order.
The user can move a column in the grid section of the xamGantt control to change its position.
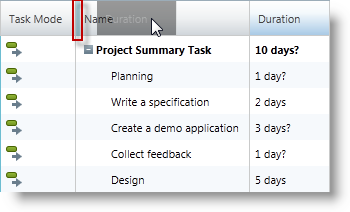
To achieve this interaction, click on a column header while holding down the mouse’s left button while dragging the column header. An indicator appears when is possible to place the column.
Use the ESCAPE while dragging to return the column to its previous position.
The user can show a column that is currently invisible on the xamGantt control’s view in the grid section.
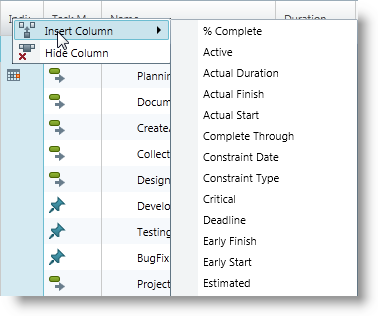
To achieve this interaction, use a right mouse button click on the columns headers area. A context menu appears with option “Insert Column”. Hovering over the “Insert Column” menu item, a list of available columns displays from which to select the column to show.
The user can hide a column that is currently visible in the grid section of the xamGantt control.
To achieve this interaction, perform a mouse right click on the column header area of the column. A context menu appears with option “Hide Column”. Clicking on this option hides the specified column.
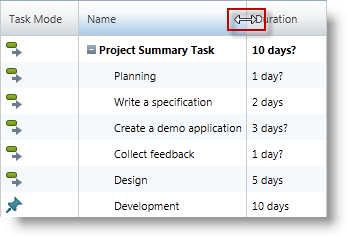
The user can resize a column by dragging the left or right edge of the column header in the grid section of the xamGantt control.
Double mouse click on the right edge of the column header resizes the column to the width of its largest content.
The user can expand and collapse the summary tasks in the grid section of the xamGantt control.
To achieve this interaction, click on the plus/minus icon in front of the summary task name.
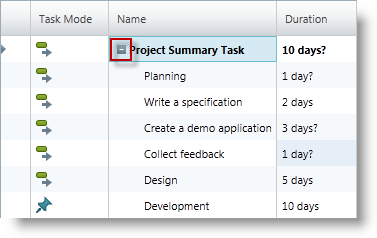
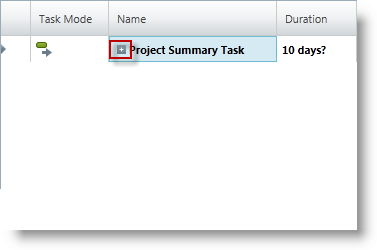
The expanding/collapsing of the summary tasks can be performed also using keyboard shortcuts:
expand - Alt + Shift + Plus
collapse - Alt + Shift + Minus
The user can select rows, columns or cells in the grid section of the xamGantt control.
To do this, use either the mouse, the keyboard or both.
To perform single element selection:
Click on a cell to select a cell
Click on the row selector to select a row
Click on the column header to select column
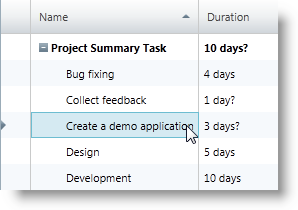
Selecting a cell
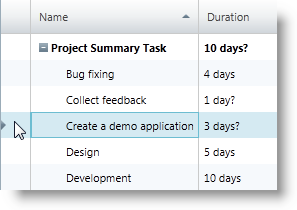
Selecting a row
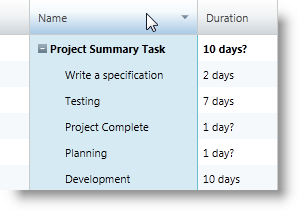
Selecting a column
To perform multiple elements selection, use:
SHIFT + Mouse Click for multiple, continuous selection
CTRL + Mouse Click for multiple, discontinuous selection
The user can insert a new task in the grid section of the xamGantt control.
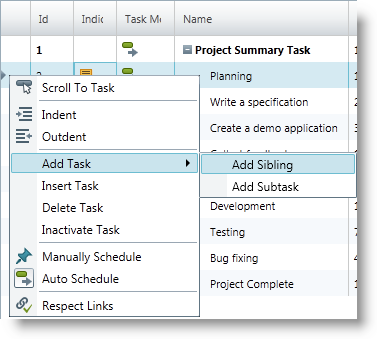
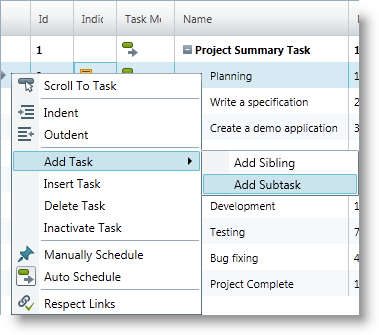
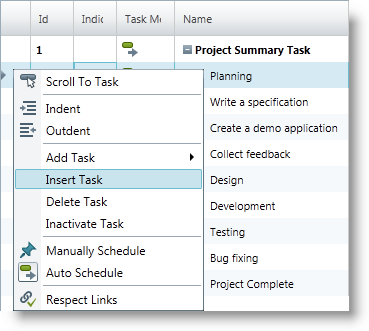
To achieve this interaction, right click with the mouse on the grid area to open a context menu and select from the several available options.
The user can:
add a new sibling task below the currently selected task
add a new child task to the currently selected task
insert a new task above the currently selected task
The user can delete a task in the grid section of the xamGantt control.
Achieve this interaction by:
right mouse clicking in the grid area to open a context menu and choose “Delete Task”
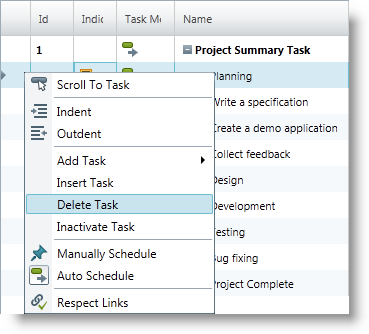
selecting a row and use the Delete keyboard button
Context menus appear after a right click mouse event in the grid section of the xamGantt control. The menus options depend on the element on which the user clicked.
Several context menus appear in different areas of the grid section.
The following screenshot illustrates the context menu that appears after a right mouse click in the upper left corner of the xamGantt grid:
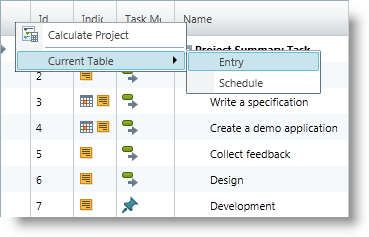
The available user actions in this menu include:
Calculate Project (to execute project calculation)
Current Table (to change the current table view)
Entry (table view)
Schedule (table view)
The following screenshot illustrates the context menu that appears after a right mouse click on a column header area:
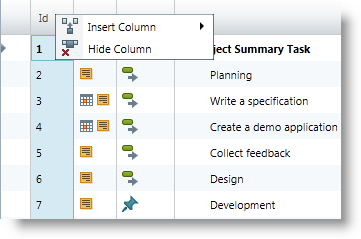
Available user actions in this menu are:
Insert Column
Hide Column
The following screenshot illustrates the context menu that appears after a right mouse click on:
the selected row
the row selector
the selected cell
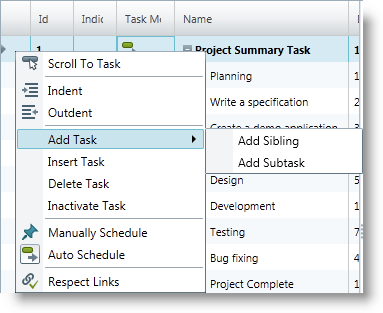
Available user actions in this menu are:
Scroll To Task
Indent
Outdent
Add Task
Add Sibling
Add Subtask
Insert Task
Delete Task
Inactivate Task
Manually Schedule
Auto Schedule
Respect Links
The following screenshot illustrates the context menu that appears after a right mouse click in the empty grid section:

Available user actions in this menu are:
Add Task
Add Sibling
Add Subtask
Insert Task
Use the ESCAPE or click outside the menu to hide the context menu.
The following topics provide additional information related to this topic.