<ig:OrgChartNodeLayout
    TargetTypeName="Employee"
    DisplayMemberPath="FirstName"
ToolTipPath="JobTitle" />This topic demonstrates how to add tooltips to the nodes of xamOrgChart™ and how to customize their content.
The topic is organized as follows:
The xamOrgChart and the OrgChartNodeLayout class have properties related to the usage of tooltips:
AllowToolTips – determines whether to display a tooltip or not.
ToolTipPath – the path to the value that will serve as a visual representation of the source object.
ToolTipContentTemplate – a custom tooltip template.
The field to be used as a tooltip is specified in the ToolTipPath property.
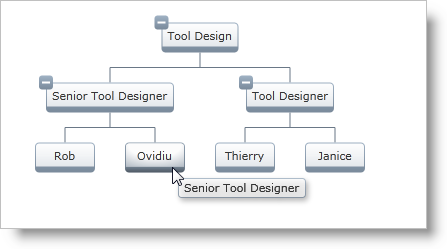
Adding ToolTipPath="JobTitle" will create a simple tooltip displaying the Job Title for all Employee nodes.
In XAML:
<ig:OrgChartNodeLayout
TargetTypeName="Employee"
DisplayMemberPath="FirstName"
ToolTipPath="JobTitle" />
Figure 1: A simple tooltip
Adding a tooltip to the xamOrgChart:
In XAML:
<ig:XamOrgChart
    ToolTipPath="JobTitle">
</ig:XamOrgChart>Use the TooltipContentTemplate property to specify a custom template for the tooltip.
Creating a DataTemplate object:
In XAML:
<DataTemplate x:Key="EmployeeTooltipTemplate">
    <StackPanel>
        <TextBlock Text="{Binding JobTitle}" FontWeight="Bold" />
        <TextBlock Text="{Binding FirstName}" />
        <TextBlock Text="{Binding LastName}" />
    </StackPanel>
</DataTemplate>
In XAML:
<ig:OrgChartNodeLayout
    TargetTypeName="Employee"
    DisplayMemberPath="FirstName"
    ToolTipContentTemplate="{StaticResource EmployeeTooltipTemplate}" />
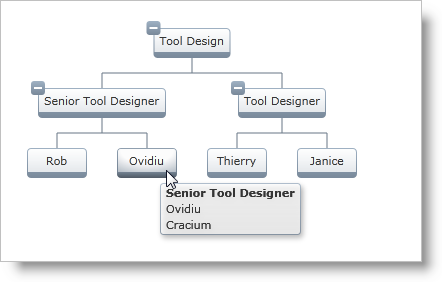
Figure 2: A custom tooltip using a Data Template
Adding a custom tooltip to the xamOrgChart:
In XAML:
<ig:XamOrgChart
    ToolTipContentTemplate ="{StaticResource EmployeeTooltipTemplate}">
</ig:XamOrgChart>