This topic explains how to create application project to use with Infragistics Xamarin.Forms controls.
This topic contains the following sections:
The following procedure demonstrates creating a project using Infragistics Xamarin.Forms Controls.
To complete the procedure, you need the following:
Visual Studio tools for Xamarin installed from https://visualstudio.microsoft.com/xamarin website.
Have your application target the supported version of Xamarin.Forms, Visual Studio, Android, and iOS as outlined on our Supported Environments Page.
Open Visual Studio 2019
From the opening screen, select the Create a new project item.
Select the Mobile App (Xamarin.Forms) project template. Name the project SampleApp and click the Create button.
Choose the structure of the application you would like to create. This topic is built against the Blank application template.
This will create three separate projects:
SampleApp — This is a portable class library where you can put your shared logic and layout.
SampleApp.Droid — This is where you can put any Android specific logic or layout, and bootstraps Xamarin.Forms onto an Android device.
SampleApp.iOS — This is where you can put any iOS specific logic or layout, and bootstraps Xamarin.Forms onto an iOS device.
You can use Infragistics NuGet package as follows. If you are unfamiliar with NuGet, see the following Nuget Tutorial.
Right click on the solution node.
Select Manage NuGet Packages For Solution menu item.
Click on the Browse tab.
Type "Infragistics" into the search box.
According to the controls used for the solution, the following NuGet packages will install the necessary references:
For each necessary NuGet Package:
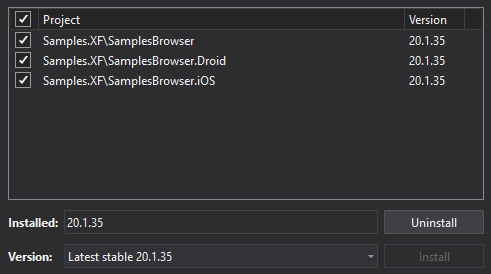
Select the package in the package browser.
Select all projects.
Select the version of Infragistics NuGet Packages you want to use.

Click Install.
Click OK to accept changes if a preview changes dialog appears.
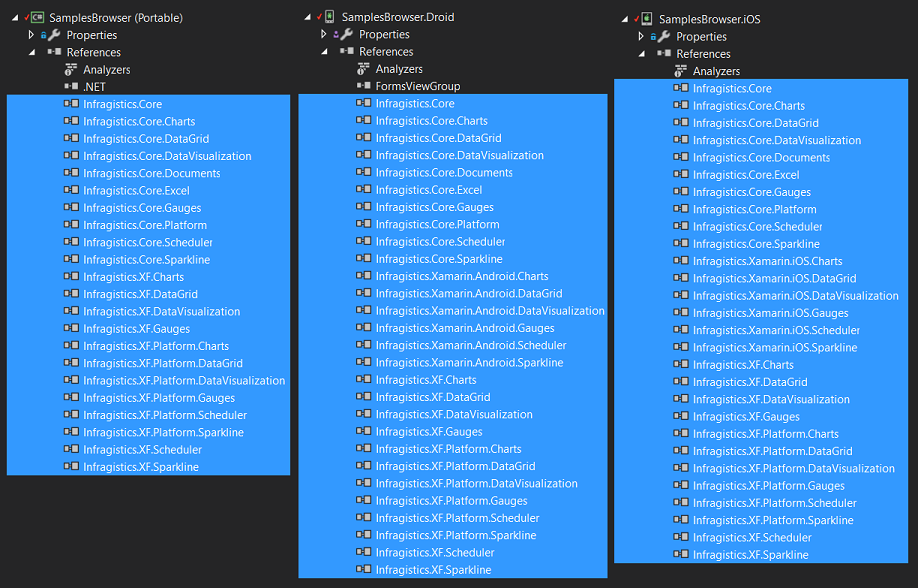
These images list Infragistics assemblies that were referenced in projects after adding all Infragistics NuGet packages. You might see subset of these assemblies if you selected only a few NuGet packages for Infragistics components:

Add the following namespaces to code-behind files in which you are planning to create instances of Infragistics controls:
In XAML:
xmlns:igBarcodes="clr-namespace:Infragistics.XamarinForms.Controls.Barcodes;assembly=Infragistics.XF.Barcodes"
xmlns:igGauges="clr-namespace:Infragistics.XamarinForms.Controls.Gauges;assembly=Infragistics.XF.Gauges"
xmlns:igGrids="clr-namespace:Infragistics.XamarinForms.Controls.Grids;assembly=Infragistics.XF.DataGrid"
xmlns:igCharts="clr-namespace:Infragistics.XamarinForms.Controls.Charts;assembly=Infragistics.XF.Charts"
xmlns:igSpark="clr-namespace:Infragistics.XamarinForms.Controls.Charts;assembly=Infragistics.XF.Sparkline"
xmlns:igScheduler="clr-namespace:Infragistics.XamarinForms.Controls.Scheduler;assembly=Infragistics.XF.Scheduler"
In C#:
using Infragistics.XamarinForms;
using Infragistics.XamarinForms.Controls.Barcodes; // for XamQRCodeBarcode
using Infragistics.XamarinForms.Controls.Gauges; // for XamRadialGauge, XamLinearGauge, XamBulletGraph
using Infragistics.XamarinForms.Controls.Charts; // for XamDataChart, XamCategoryChart, XamFunnelChart, XamPieChart, XamSparkline, XamDoughnutChart
using Infragistics.XamarinForms.Controls.Grids;  // for XamDataGrid
using Infragistics.XamarinForms.Controls.Scheduler; // for XamSchedulerRefer to the Getting Started sections under the following topics in order to create instances of Infragistics controls: