부트스트랩 테마
Ignite UI for Angular 테마 엔진은 Bootstrap의 마크업과 CSS 기반의 인기NG Bootstrap 있는 컴포넌트 라이브러리와 함께 사용할 수 있는 기회를 제공합니다.
개요
이 Ignite UI for Angular는 머티리얼 기반 UI 위젯, 컴포넌트 및 Sketch UI 키트의 완전한 세트이며, 개발자가 최신 고성능 앱을 구축할 수 있도록 하는 Angular 용 지원 지시문입니다. 우리의 테마 엔진은 사용하기 쉽고 단일 구성 요소, 여러 구성 요소 또는 전체 제품군에서 다양한 수준에서 테마 세분성을 허용합니다. 따라서 일부 사용자는 Ignite UI 구성 요소뿐만 아니라 다른 라이브러리와도 함께 활용하기를 원합니다. 이 기사에서는 Ng Bootstrap 구성 요소와 함께 Ignite UI의 사용법을 살펴 보겠습니다.
Demo
Basic Usage
Add NG Bootstrap
Angular CLI를 사용하고 기존 Angular 프로젝트가 있는 경우 아래 명령으로 NG Bootstrap을 설치할 수 있습니다.
ng add @ng-bootstrap/ng-bootstrap
설치가 완료되면 NG Bootstrap 기본 모듈을 app.module.ts 파일로 가져와야 합니다.
import {NgbModule} from '@ng-bootstrap/ng-bootstrap';

@NgModule({
    imports: [
        ...,
        NgbModule,
        ...
    ]
)}
이 시점에서 애플리케이션은 NG 부트스트랩 컴포넌트를 사용할 준비가 된 상태입니다. 부트스트랩 라이브러리 사용에 관한 자세한 정보는 그들의official documentation 웹사이트에서 확인할 수 있습니다.
Add Ignite UI for Angular
모든 종속성, 글꼴 가져오기, 스타일 참조와 함께 Ignite UI for Angular 패키지를 설치하려면 프로젝트에서 다음 명령을 실행하세요.
ng add igniteui-angular
그런 다음 app.module.ts 파일에 해당 모듈을 가져와서 Ignite UI 구성 요소를 사용할 수 있습니다.
// manually addition of the Igx Avatar component
import { IgxAvatarModule } from 'igniteui-angular/avatar';
// import { IgxAvatarModule } from '@infragistics/igniteui-angular'; for licensed package

@NgModule({
    imports: [
        ...,
        IgxAvatarModule,
        ...
    ]
)}
기존 프로젝트에서 Ignite UI for Angular 사용에 관한 완전한 소개를 원하시면 저희Getting Started 주제를 따라가세요. 각 컴포넌트를 가져오고 사용하는 방법에 대한 추가 정보와 가이드 예제는 컴포넌트 문서에서 확인할 수 있습니다.
Components
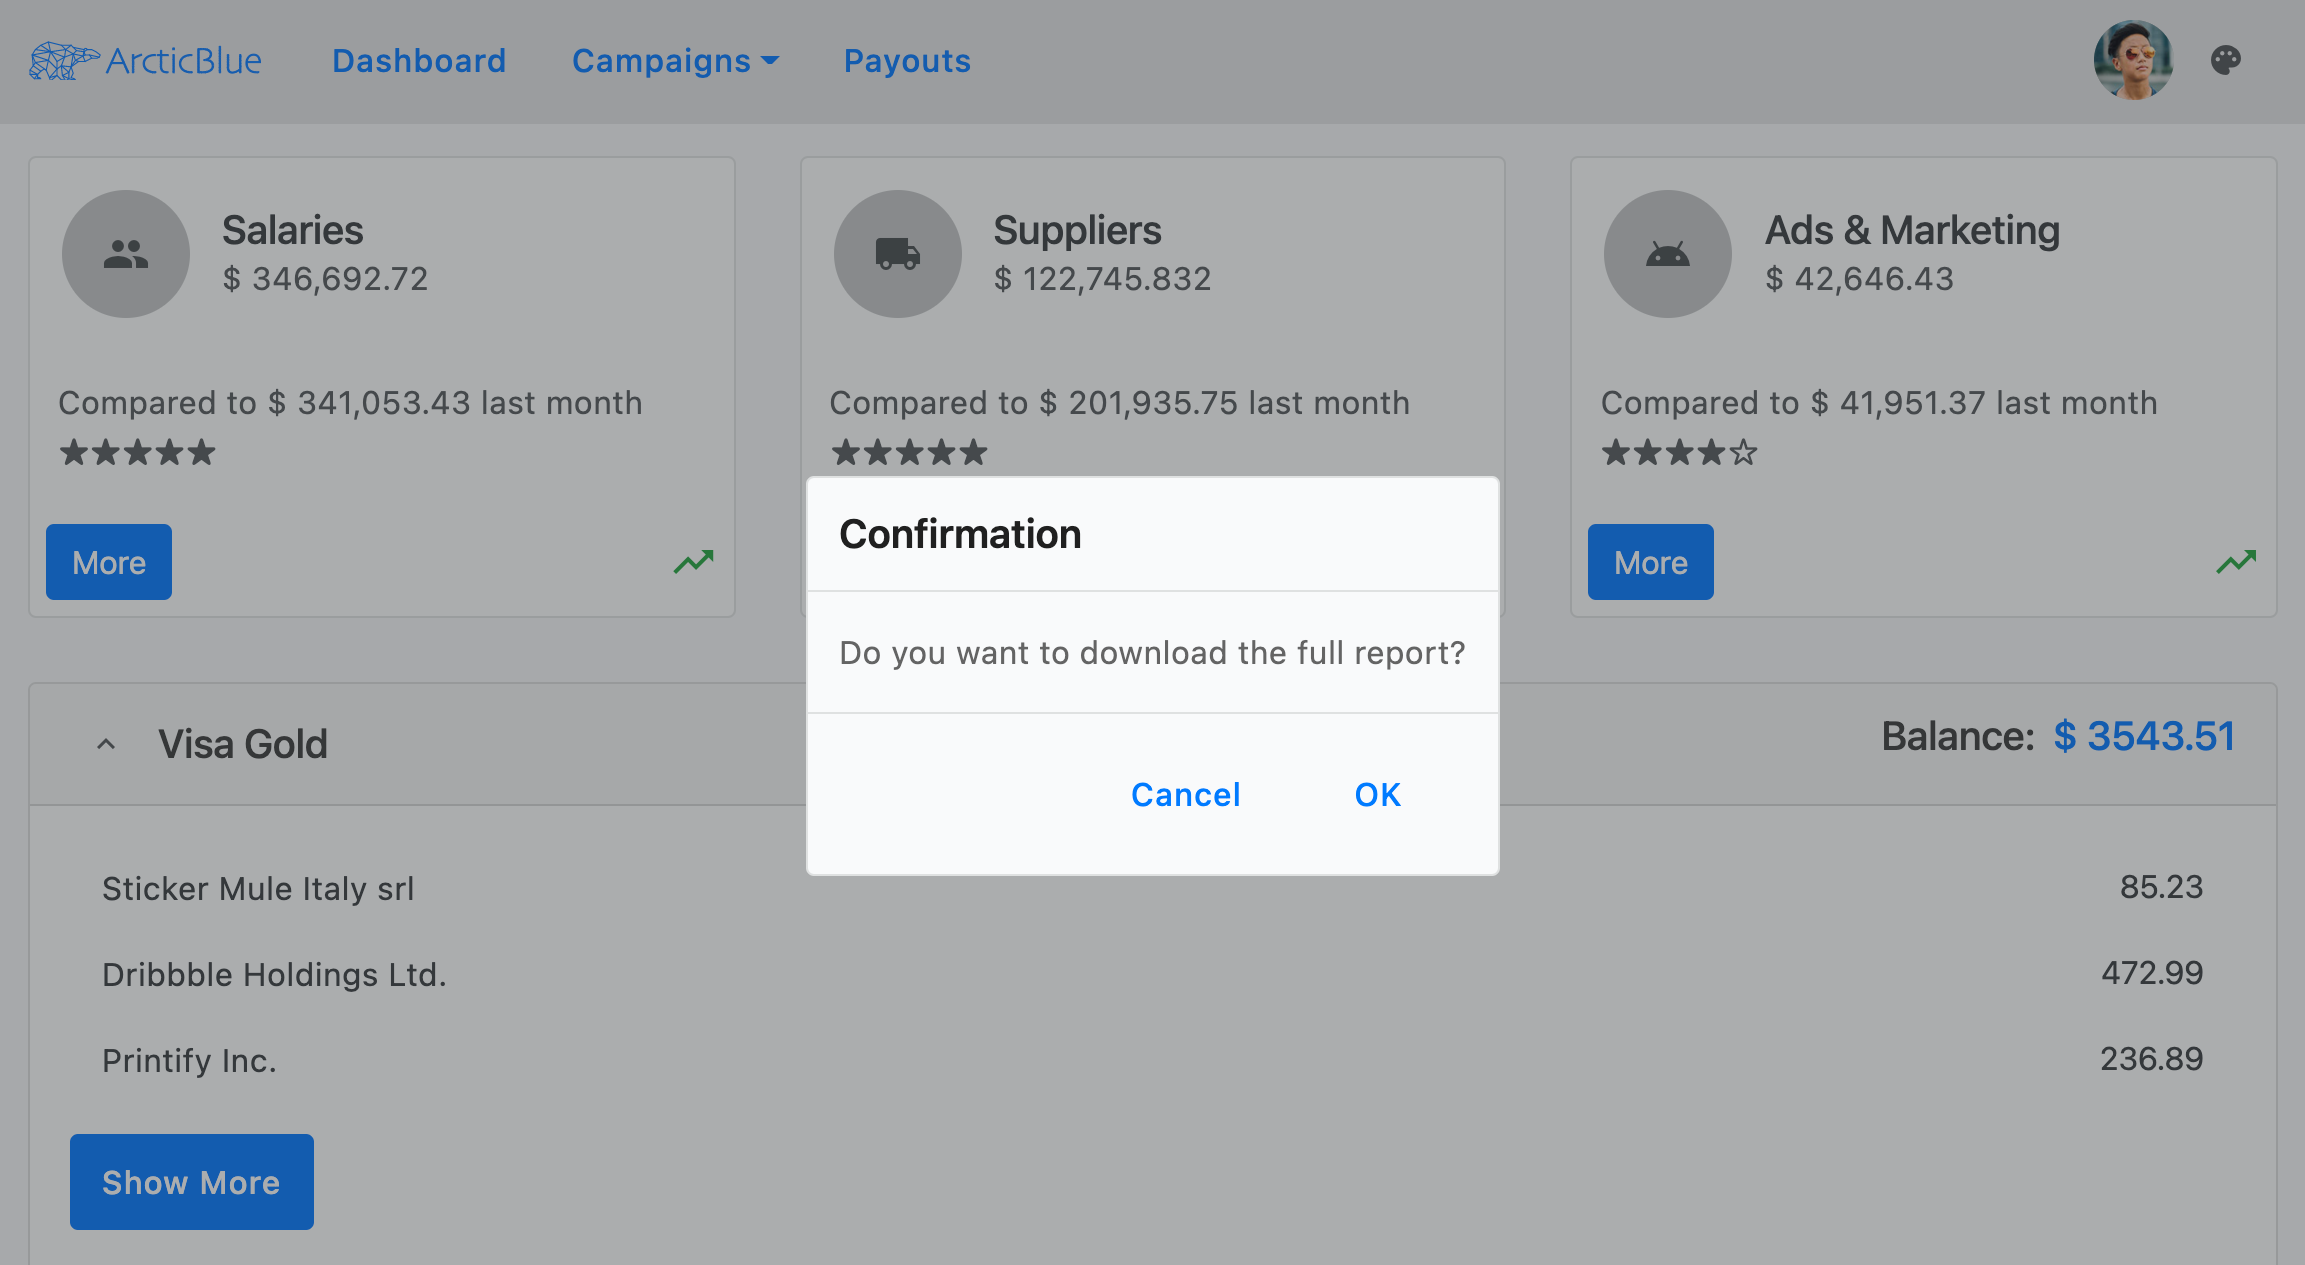
데모 샘플이 어떻게 만들어졌는지 한번 봅시다. Ignite UI와 NG 부트스트랩 컴포넌트가 혼합되어 하나의 애플리케이션에 잘 맞게 디자인되어 있습니다. 예시에서 내비게이션은 부트스트랩navbar과 그리고 함께igx-buttonsigx-avatar 생성됩니다.dropdown 캠페인 아래 버튼도 부트스트랩 라이브러리에서 가져온 것입니다. 내비게이션 아래에는 일부 통계 데이터를 표시하는 컴포넌트를 사용하고igx-card 있습니다. 카드 안에는 여러 아이템을 넣었고, 부igx-avatarsigx-icons 트스트랩buttons과ngb-ratings 함께도 있습니다.

버튼을 클릭하면More 다음과 같은 내용을igx-dialog 볼 수 있습니다:

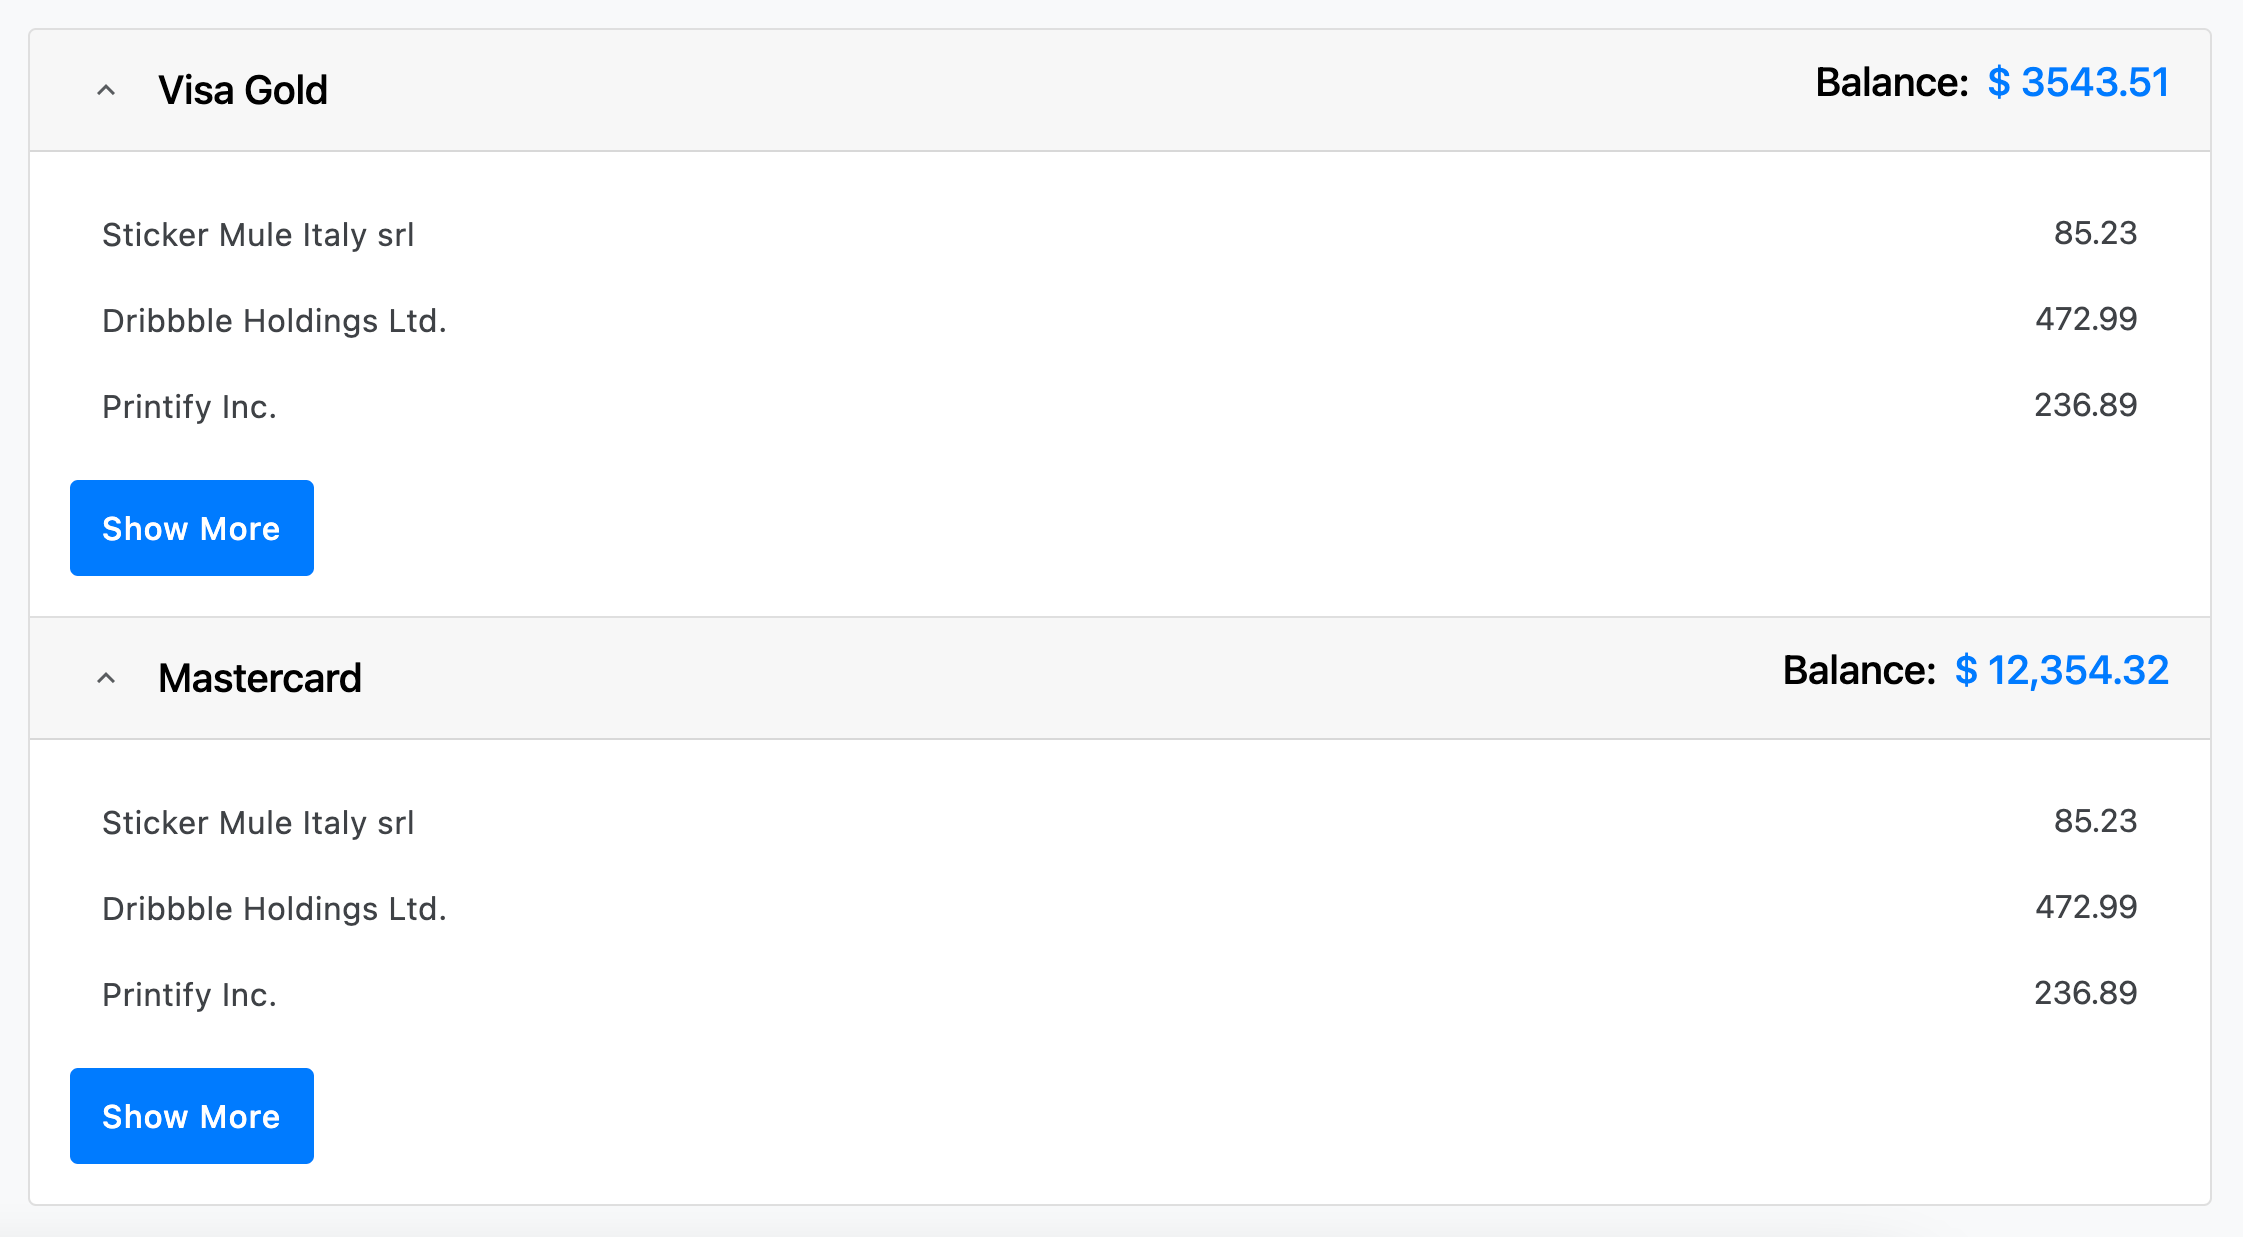
다음으로, 신용카드에 관한 정보를 추가ngb-accordion 했습니다. 그 내용 안에는 'igx-listandigx-button '가 있다.

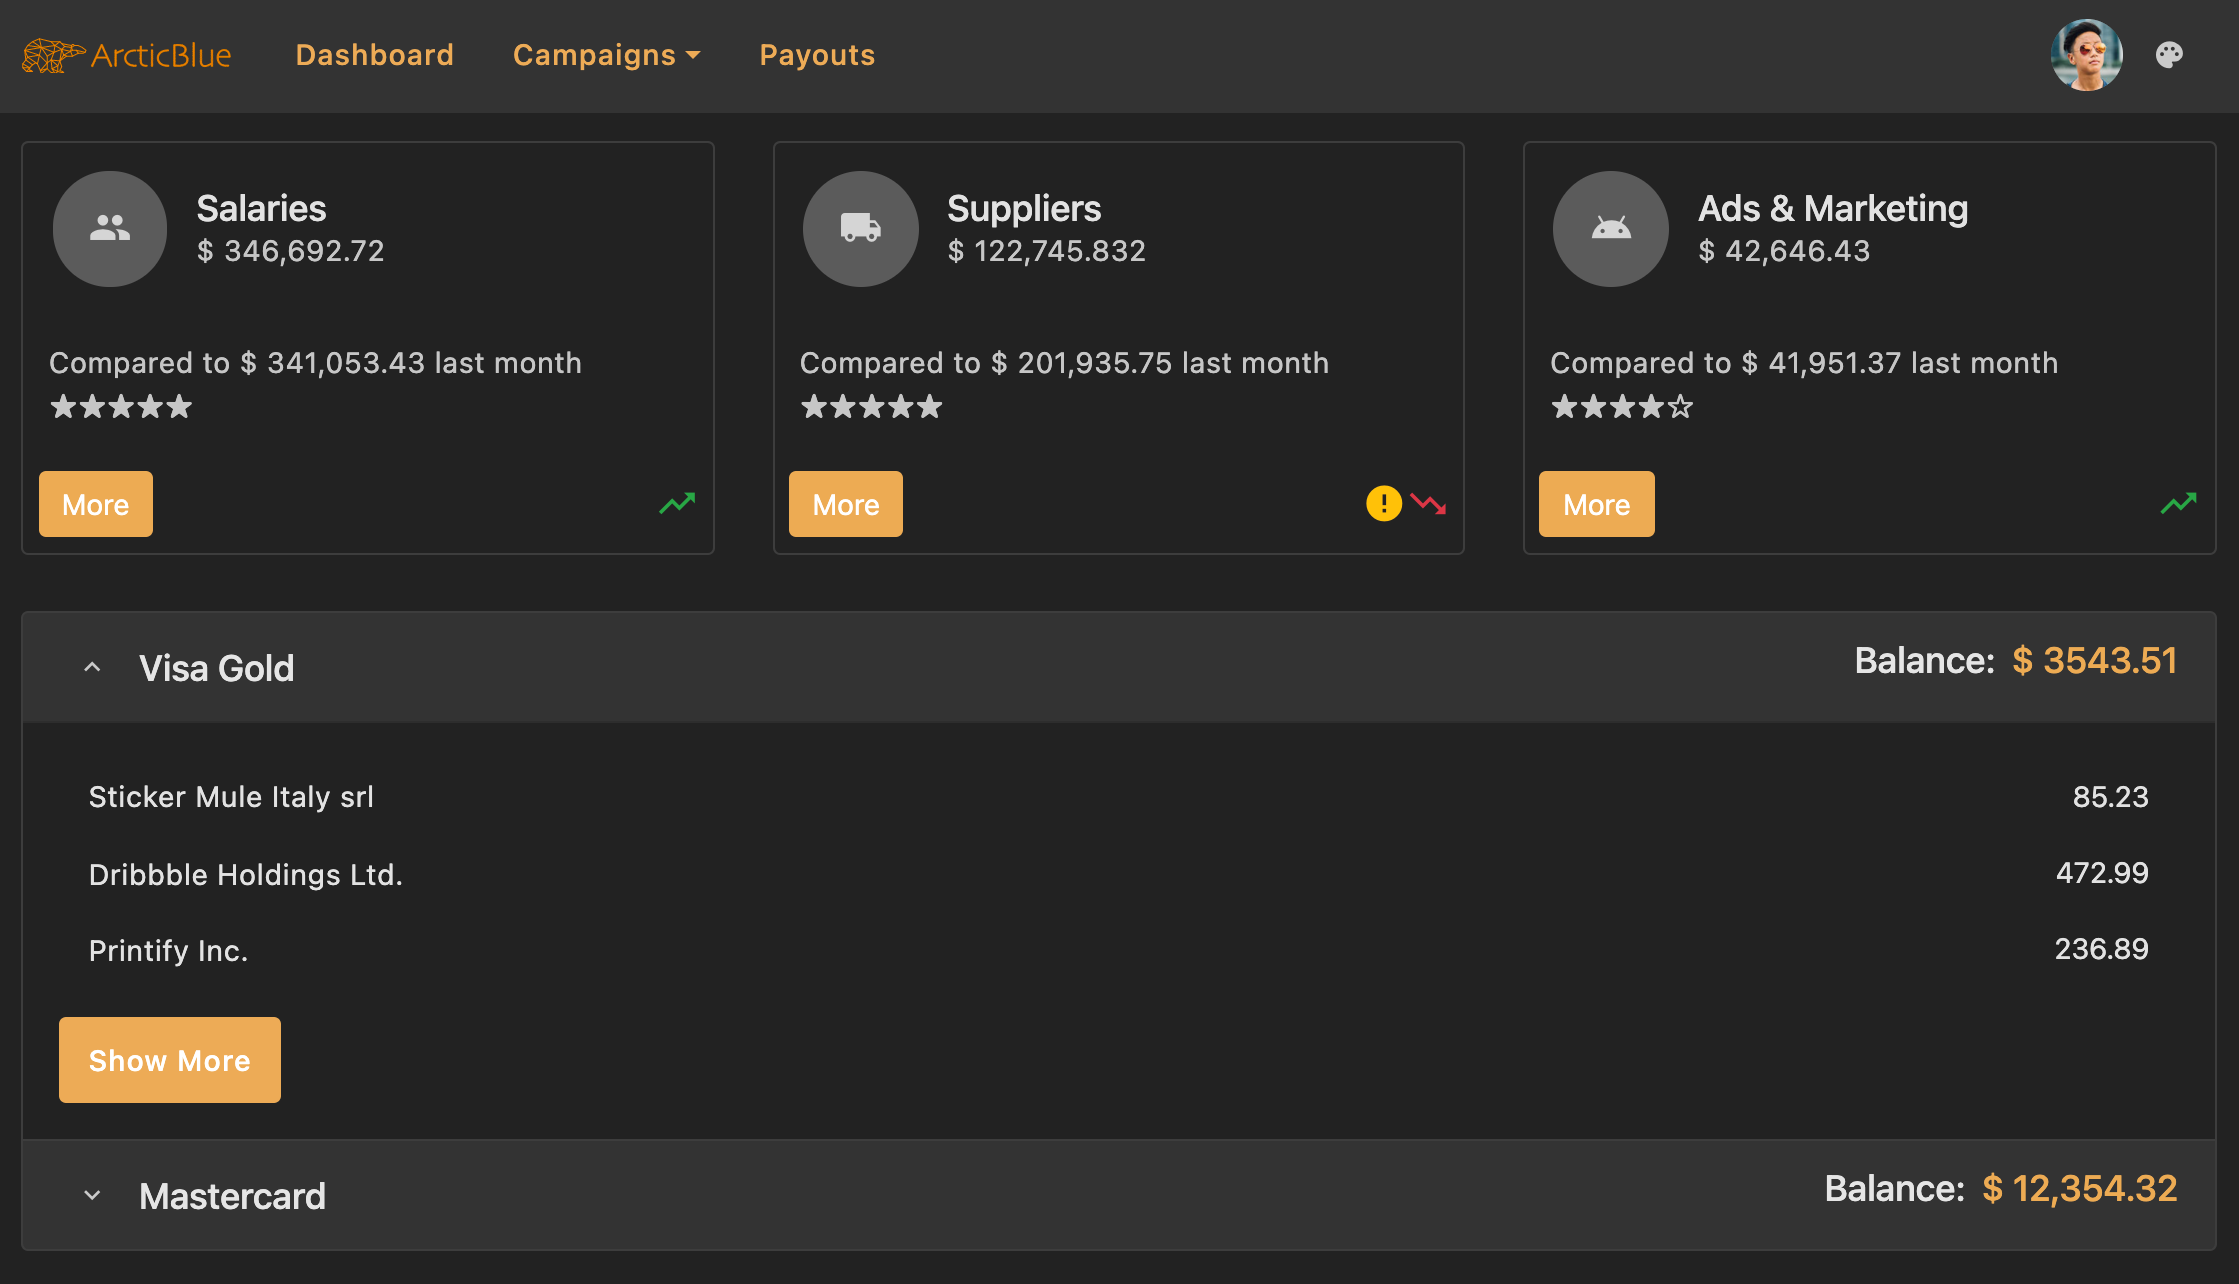
마지막으로, 우리는 오른쪽 상단에 전체 앱의 테마를 바꾸는 Ignite UI for Angularicon button을 삽입했습니다:

스타일링
Ignite UI 테마 엔진으로 컴포넌트 스타일링을 시작하려면, 원하는 이름의 SCSS 파일을 만들어 글로벌 테마의 기본 파일로 삼으세요. 이 파일을_variables.scss 파일이라고 부를 거예요. 다음으로, 모든 테마 함수와 컴포넌트 믹신이 저장된 파일을 가져와index야 합니다:
// _variables.scss
@use "igniteui-angular/theming" as *;

// IMPORTANT: Prior to Ignite UI for Angular version 13 use:
// @import '~igniteui-angular/lib/core/styles/themes/index';
팔레트
부트스트랩 라이브러리는 8가지 색상으로 구성된 팔레트를 제공하는 Sass 맵$theme-colors을 사용합니다:
$theme-colors: (
    "primary":    $primary,
    "secondary":  $secondary,
    "success":    $success,
    "info":       $info,
    "warning":    $warning,
    "danger":     $danger,
    "light":      $light,
    "dark":       $dark
);
Ignite UI for Angular 함수는palette,,primarysecondary,gray,,info, 색상success 및 그 색상 변형을 포함하는warnerror 색상 팔레트 맵을 생성합니다. 우리의 미리 정의된 부트스트랩 팔레트는 다시 7가지 색상으로 구성되어 있습니다:
$bootstrap-palette: palette(
    $primary: #0d6efd,
    $secondary: #6c757d,
    $info: #0dcaf0,
    $success: #198754,
    $warn: #ffc107,
    $error: #dc3545,
    $surface: #f8f9fa
);
보시다시피 Bootstrap 팔레트의 대부분 색상은 Ignite UI for Angular의 Bootstrap 팔레트에 정의된 색상과 겹칩니다. 따라서 Bootstrap 테마 색상을 밝거나 어두운 Bootstrap 팔레트 색상에 간단히 매핑할 수 있습니다.
먼저, 다음 값에서 값을$light-bootstrap-palette 추출하는 Sass 변수를 정의할 것입니다:
// Colors from the Ignite UI light bootstrap color palette
$light-primary: color($light-bootstrap-palette, "primary");
$light-secondary: color($light-bootstrap-palette, "secondary");
$light-success: color($light-bootstrap-palette, "success");
$light-info: color($light-bootstrap-palette, "info");
$light-warning: color($light-bootstrap-palette, "warn");
$light-danger: color($light-bootstrap-palette, "error");
그런 다음 샘플의 어두운 모드에 사용될 새로운 색상 팔레트를 만듭니다.
// Defining custom color palette
$custom-dark-palette: palette(
    $primary: #ecaa53,
    $secondary: #011627,
    $gray: #fff,
    $surface: #222
);

// Creating Sass variables for primary and secondary colors
$dark-primary: color($custom-dark-palette, "primary");
$dark-secondary: color($custom-dark-palette, "secondary");
Note
Ignite UI for Angular에서 제공하는 팔레트에 대해 더 알아보고 새로운 팔레트를 만드는 방법을 배우려면 저희palettes with Sass 섹션을 방문해 주세요.
Themes
모드light와 를 전환dark 하기 위해, 버튼 클릭으로 변경되는 커스텀 클래스를 요소에host 추가합니다. 스타일시트 파일에는 각 클래스별로 적용된 색상 팔레트를 포함할 예정입니다.
라이트 모드
Ignite UI for Angular 미리 정의된 주제들이 포함되어 있습니다. 부트스트랩 4 도서관. 그것들을 사용하려면 먼저 우리의core 믹싱 후 내장 테마 믹싱 -부트스트랩-라이트-테마. 또한 미리 정의된 부트스트랩 팔레트도 활용할 예정입니다 -$light-부트스트랩-팔레트.
애플리케이션의 배경색은 호스트 요소에서 명시적으로 설정되어야 합니다. 샘플에서는 전달된 팔레트의 색상을surface 사용하고 싶습니다.
이 시점에서 우리는 이전에 만든 Sass 변수들로 부트스트랩$theme-colors 맵을 수정해야 합니다:
// Make sure you always include thecore mixin first
@include core();

:host {
    &.light {
        // The background color of the application in light mode
        background: color($light-bootstrap-palette, 'surface');

        ::ng-deep {
            // Applying the igx predefined light bootstrap palette and theme
            @include bootstrap-light-theme($light-bootstrap-palette);

            $theme-colors: (
                "primary": $light-primary,
                "secondary": $light-secondary,
                "success": $light-success,
                "info": $light-info,
                "warning": $light-warning,
                "danger": $light-danger
            );
        }
    }
}
light지도에서dark 얻은 색상$theme-colors은 Ignite UI 팔레트에 해당하지 않는 값으로 교체할 수 있습니다. 예컨대:
$custom-light: color($light-bootstrap-palette, "gray", 100);
$custom-dark: color($light-bootstrap-palette, "gray", 800);

:host {
    &.light {
        ::ng-deep {
            $theme-colors: (
                "light": $custom-light,
                "dark": $custom-dark,
            );
        }
    }
}
다크 모드
우리 다크 변종은 새로 만든$custom-dark-palette 것을 사용할 것입니다. 클래스 스타일에dark 포함해야 하고, 새로운 값으로 맵도$theme-colors 수정해야 합니다.
Ignite UI for Angular의 모든 구성 요소는 전달된 팔레트의 색상을 사용하므로 추가 조정 없이 어두운 모드에 잘 맞습니다. 그러나 ng-bootstrap 구성 요소에 대해 몇 가지 스타일을 더 변경해야 합니다.
:host {
    &.dark {
        // The background color of the application in dark mode
        background: color($custom-dark-palette, 'surface');

        ::ng-deep {
            // Applying our custom dark palette
            @include bootstrap-dark-theme($custom-dark-palette);

            // Overriding bootstrap button colors with colors from the custom dark palette
            .igx-card-actions .btn-primary {
                background-color: $dark-primary;
                border-color: $dark-primary;

                &:hover {
                    background-color: color($custom-dark-palette, 'primary', 600);
                }
            }

            // Overriding ngb-accordion colors with colors from the custom dark palette
            .accordion {
                .card-header {
                    background-color: color($custom-dark-palette, 'gray', 200);
                    color: color($custom-dark-palette, 'gray', 900);
                }

                .card {
                    background-color: color($custom-dark-palette, 'surface');
                    border-color: color($custom-dark-palette, 'gray', 300);
                }
            }

            // Overriding bootstrap dropdown colors with colors from the custom dark palette
            .dropdown .dropdown-menu {
                background-color: color($custom-dark-palette, 'surface');
                border-color: color($custom-dark-palette, 'gray', 300);

                .dropdown-item {
                    color: color($custom-dark-palette, 'gray', 800);

                    &:hover {
                        background-color: color($custom-dark-palette, 'gray', 200);
                    }
                }
            }

            // Modifying the bootstrap color map
            $theme-colors: (
                "primary": $dark-primary,
                "secondary": $dark-secondary
            );
        }
    }
}
마지막으로 Bootstrap 라이브러리를 가져와야 합니다. 항상 마지막에 가져와야 합니다!
:host {
    ::ng-deep {
        // Importing Bootstrap .scss file
        // Make sure you always import it last
        @import "~bootstrap/scss/bootstrap";
    }
}
맵 수정$theme-colors이 끝나면, 부트스트랩 컴포넌트는 이미 igx$light-bootstrap-palette의 색상을 밝은 모드와 어두운 모드$custom-dark-palette에 사용할 것입니다.
Warning
위 코드를::ng-deep ViewEncapsulation 선택 안에penetrateEmulated 꼭 넣으세요.
Generate class
부트스트랩navbar은 배경색으로 CSS 클래스를 사용합니다. 샘플에서는 선택한 테마에 따라 색상이 변하길 원하기 때문에 믹싱을color-classes 사용할 것입니다. 주어진 속성과 색상 팔레트에 대해 모든 색상에 대해 CSS 클래스 이름을 생성하며, 클래스 이름에 선택적으로 접두사와 접미사가 붙습니다. 데모에서는 믹싱을 두 번 포함할 예정입니다 - 첫 번째 값으로 라이트 모드$light-bootstrap-palette, 두 번째는 다크 모드$custom-dark-palette에서 다음과 같은 값으로 포함합니다:
:host {
    &.light {
        @include color-classes(
            $palette: $light-bootstrap-palette,
            $prop: 'background',
            $prefix: 'bg'
        );
    }

    &.dark {
        @include color-classes(
            $palette: $custom-dark-palette,
            $prop: 'background',
            $prefix: 'bg'
        );
    }
}
그런 다음 "bg - color from the palette - color variant" 패턴에 따라 내비게이션 컴포넌트에 CSS 클래스를 추가하세요. 저희 샘플 앱에서는 저희가bg-gray-200 사용하고 있습니다.
타이포그래피
Ignite UI for Angular 각 테마에 대해 네 가지 기본 타입 척도를 공개하며, 이를 믹싱 내에서typography 사용하여 애플리케이션의 글로벌 타이포그래피 스타일을 정의할 수 있습니다. 예시에서는 미리 정의typeface 된 부트스트랩을 적용할 예정이지만,type-scale 원하시면 커스텀 부트스트랩을 만들 수도 있습니다.
:host {
    @include typography($font-family: $bootstrap-typeface, $type-scale: $bootstrap-type-scale);
}
API References
관련 주제:
Additional Resources
우리 커뮤니티는 활동적이며 항상 새로운 아이디어를 환영합니다.